")
Concrete. Strong in compression, weak in tension, right?
That was one of those really early civil engineering lessons that we learned about early in our 200-level Strength of Materials course.
Steel. Strong in tension, kinda strong in compression if the shape is right.
Concrete cracks. At least that’s what a Contractor will tell you when you get an uncontrolled crack. And then you debate with him as to the source of the crack. Age old arguments.
But did you know that steel can crack? It’s a rarity in our business, but it happens. And unfortunately, cracked steel in tension can be extremely dangerous as most of us Chicagoans heard about this past winter when a section of Lake Shore Drive had to be closed due to a couple of girder bearing splices cracked.
So how do we, as construction engineers, check structural steel for cracks? I had to run a field test a few years ago under some unusual circumstances to check a bridge girder for cracks….and the source of the potential cracks was from an unlikely suspect…..
Back to Bensenville, Illinois
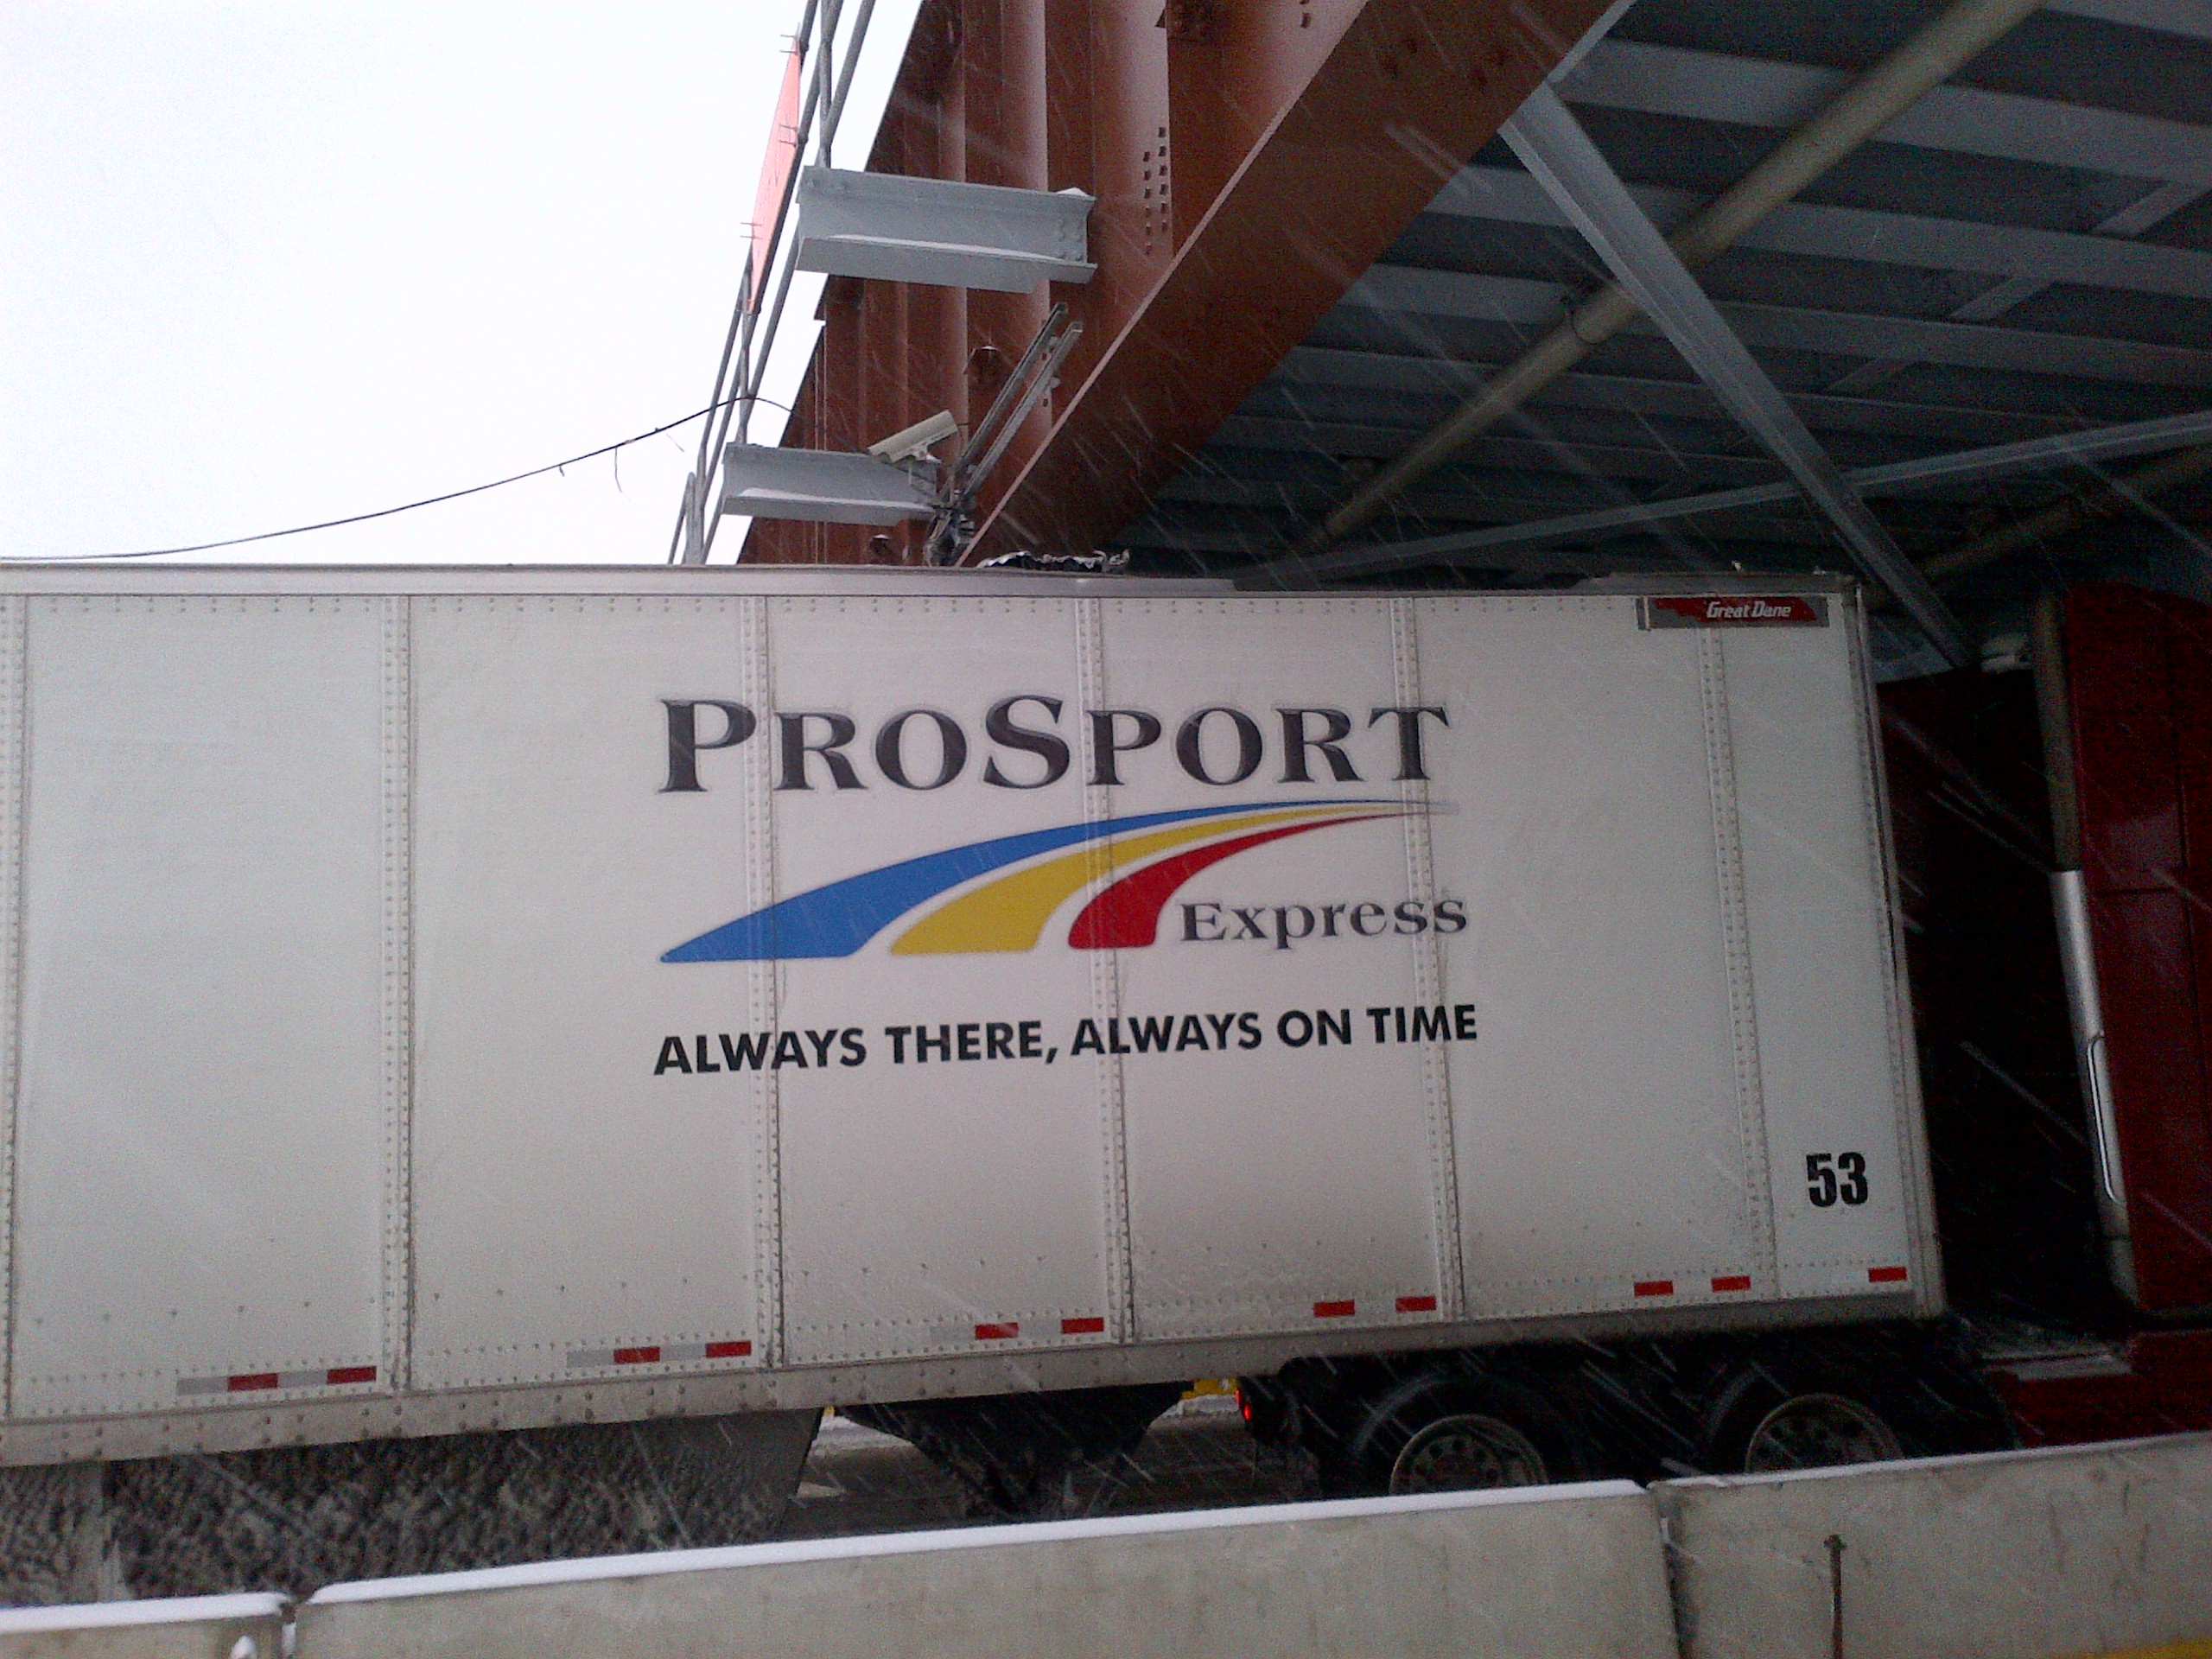
So I’ve written several articles about our grade separation project for the Illinois Department of Transportation, the Village of Bensenville and Canadian Pacific Railroad where I served as the project’s Resident Engineer.
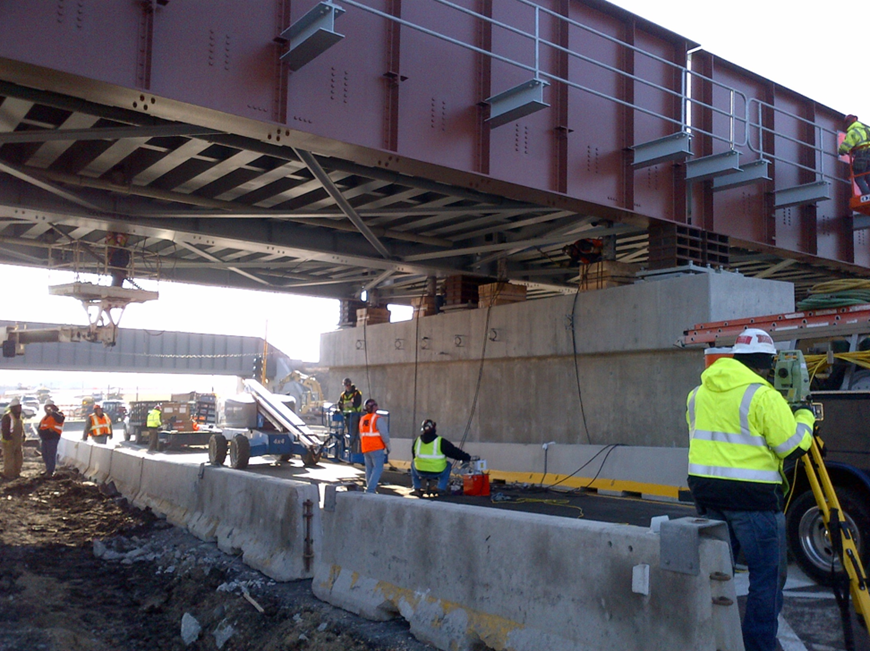
The most unique design and construction challenge was the proximity of several features:
–The existing elevation of the York Road & Irving Park Road Intersection
–The existing elevation of the Canadian Pacific tracks
–The existing elevation of the Canadian Pacific / Metra tracks where the new 2 track bridge would connect
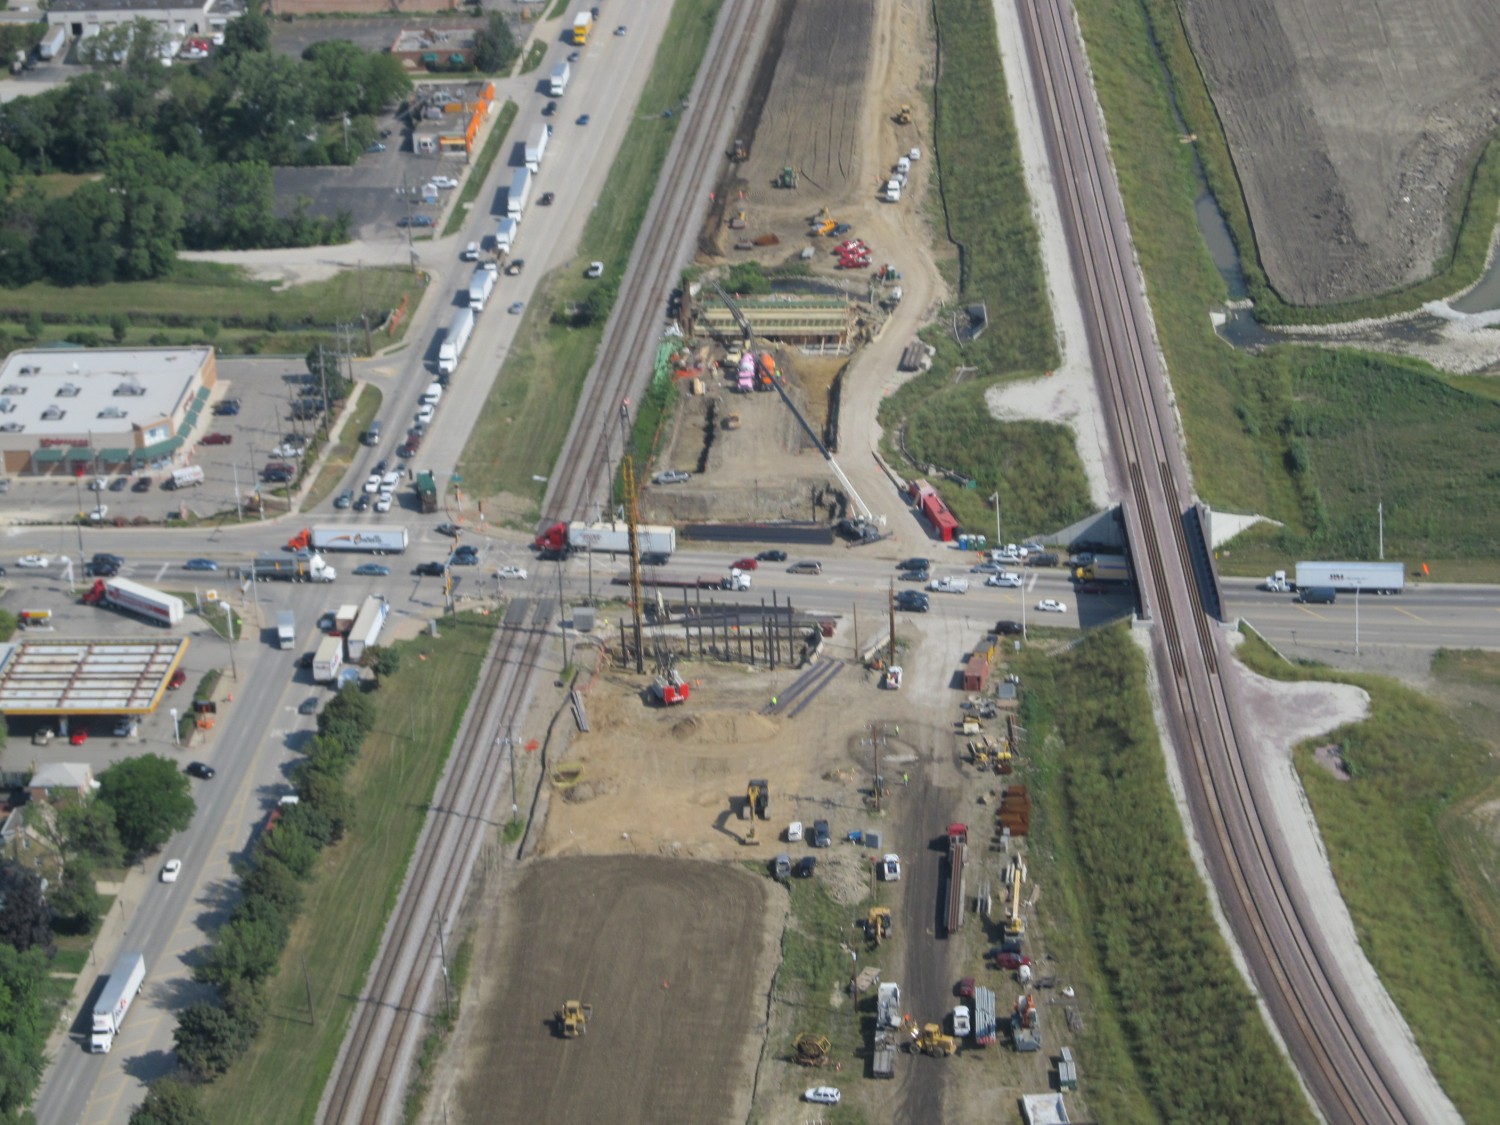
Combining these 3 parameters, in order to construct the bridge AND keep Irving Park Road traffic traveling under it AND achieve the shallow longitudinal CP Rail track profile (the bridge would be the high point of the track) to properly tie into the CP/Metra yard AND provide bridge girders that were sized for the loads, we had to shove 10 pounds of s*@t into the proverbial 5 pound bag.
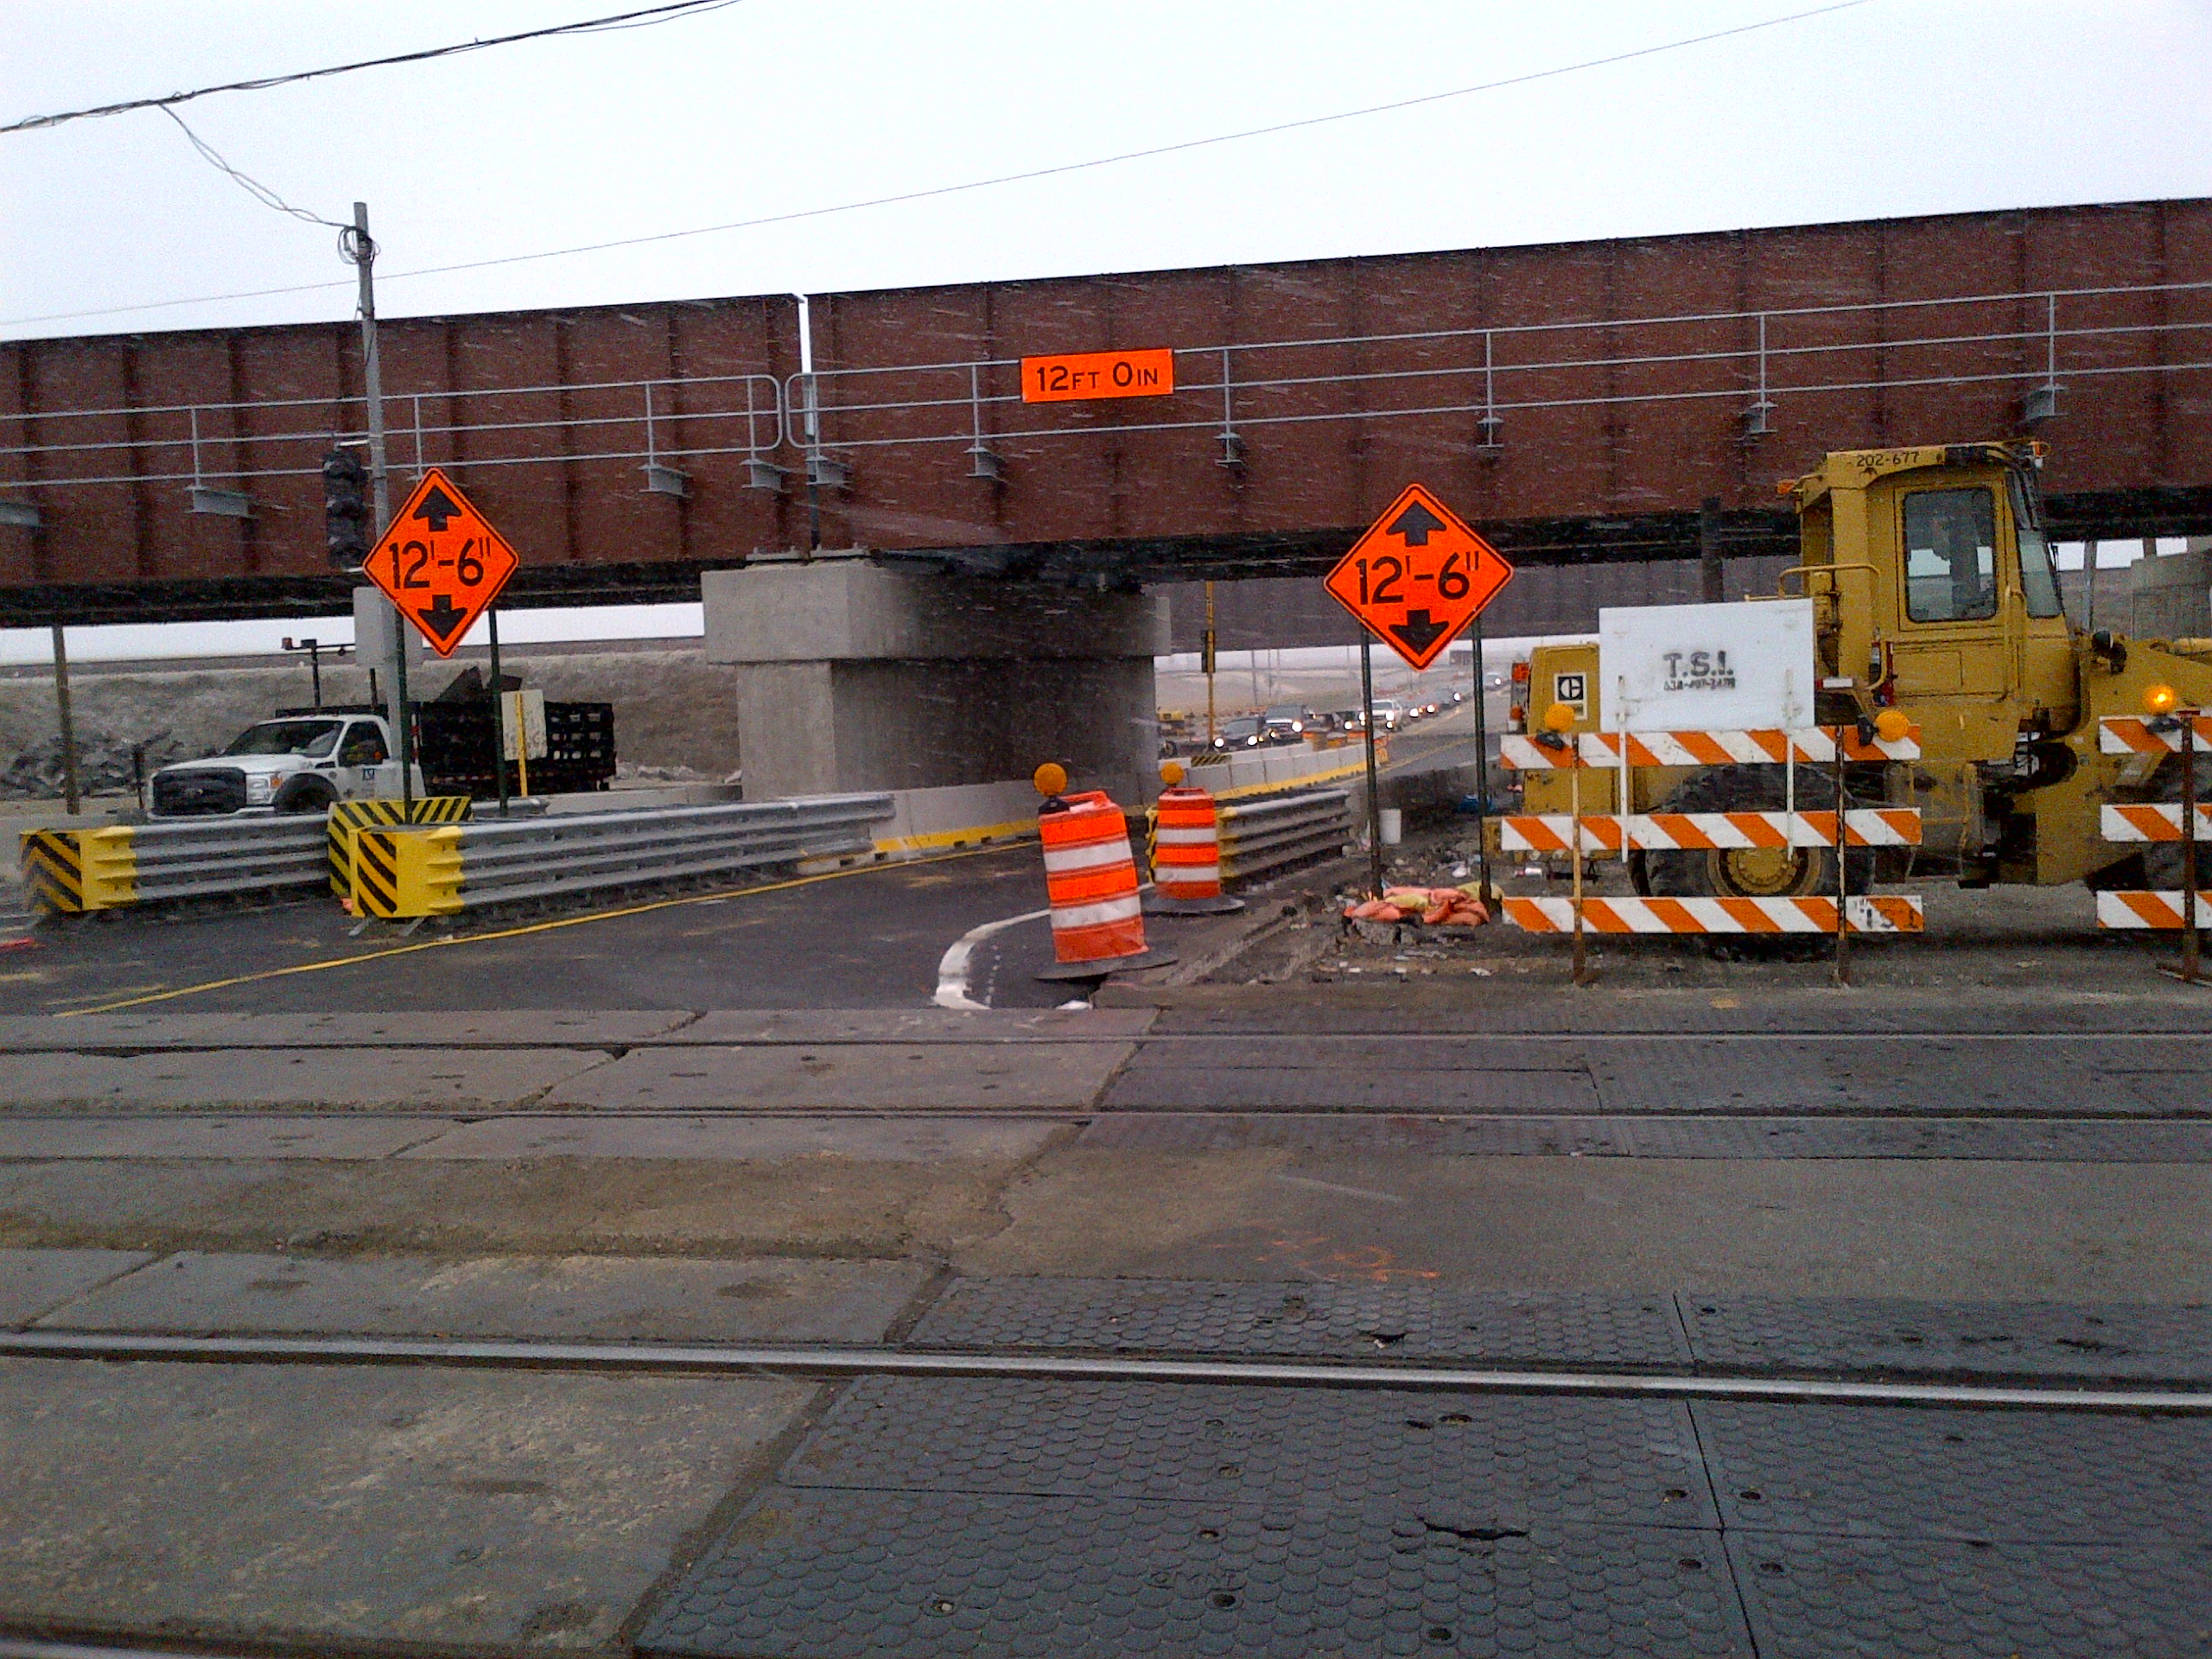
The only solution to accommodate all of these geometrical constraints was to, temporarily, have a Low Bridge Clearance condition. It was not in anyone’s local interest to close the underpass after the girders were set into place. We’d have a 12′-6″ clearance for a couple of months while the 2nd existing at-grade track was moved onto the new bridge.
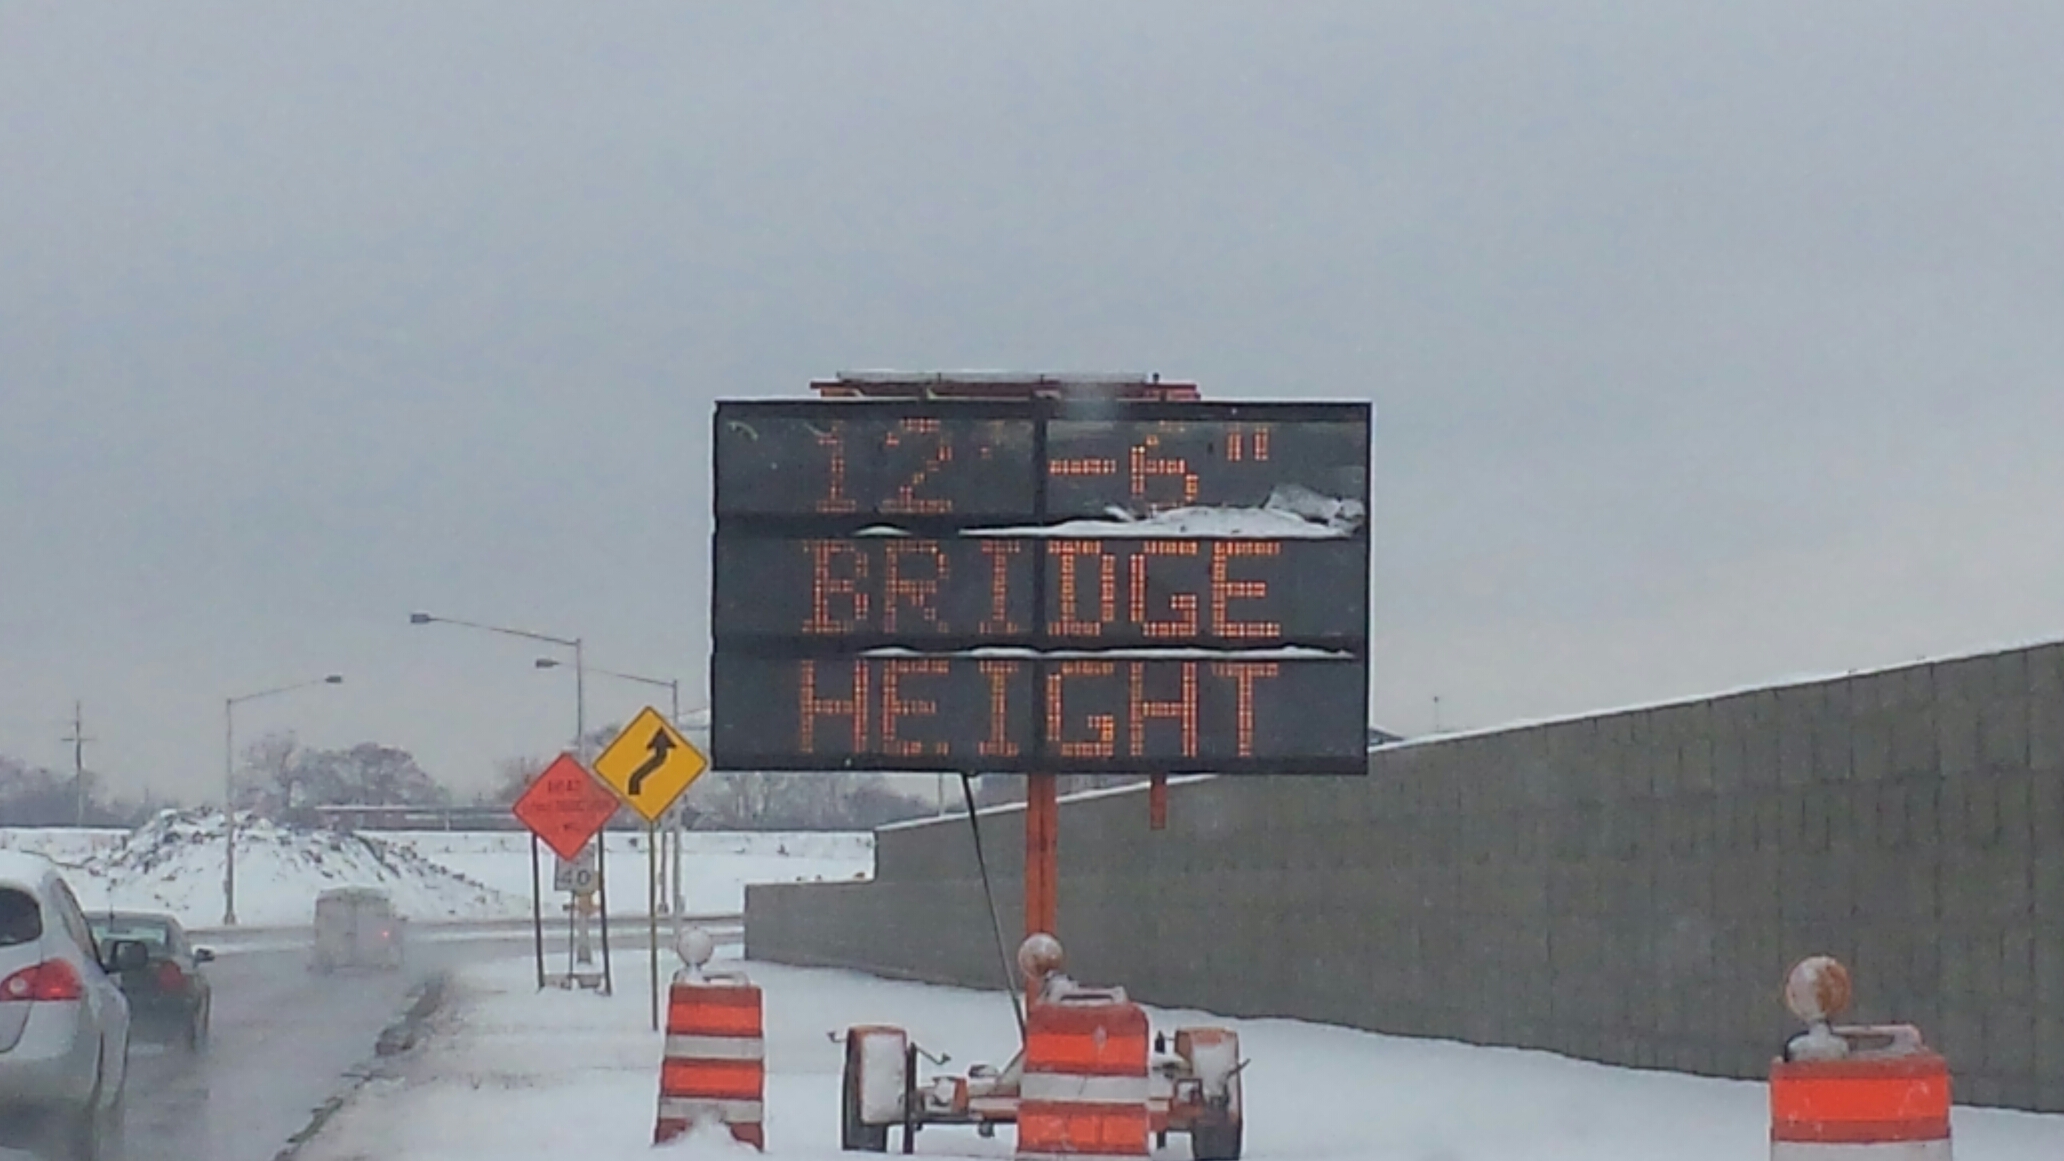
So we put up signs. LOTS OF SIGNS. In fact, there were over 400 signs associated with the Low Clearance condition and truck detour. IDOT did press releases. We put out changeable message boards alerting drivers of the impending condition.
Go ahead and guess what happened? I’ll give you 1 guess….
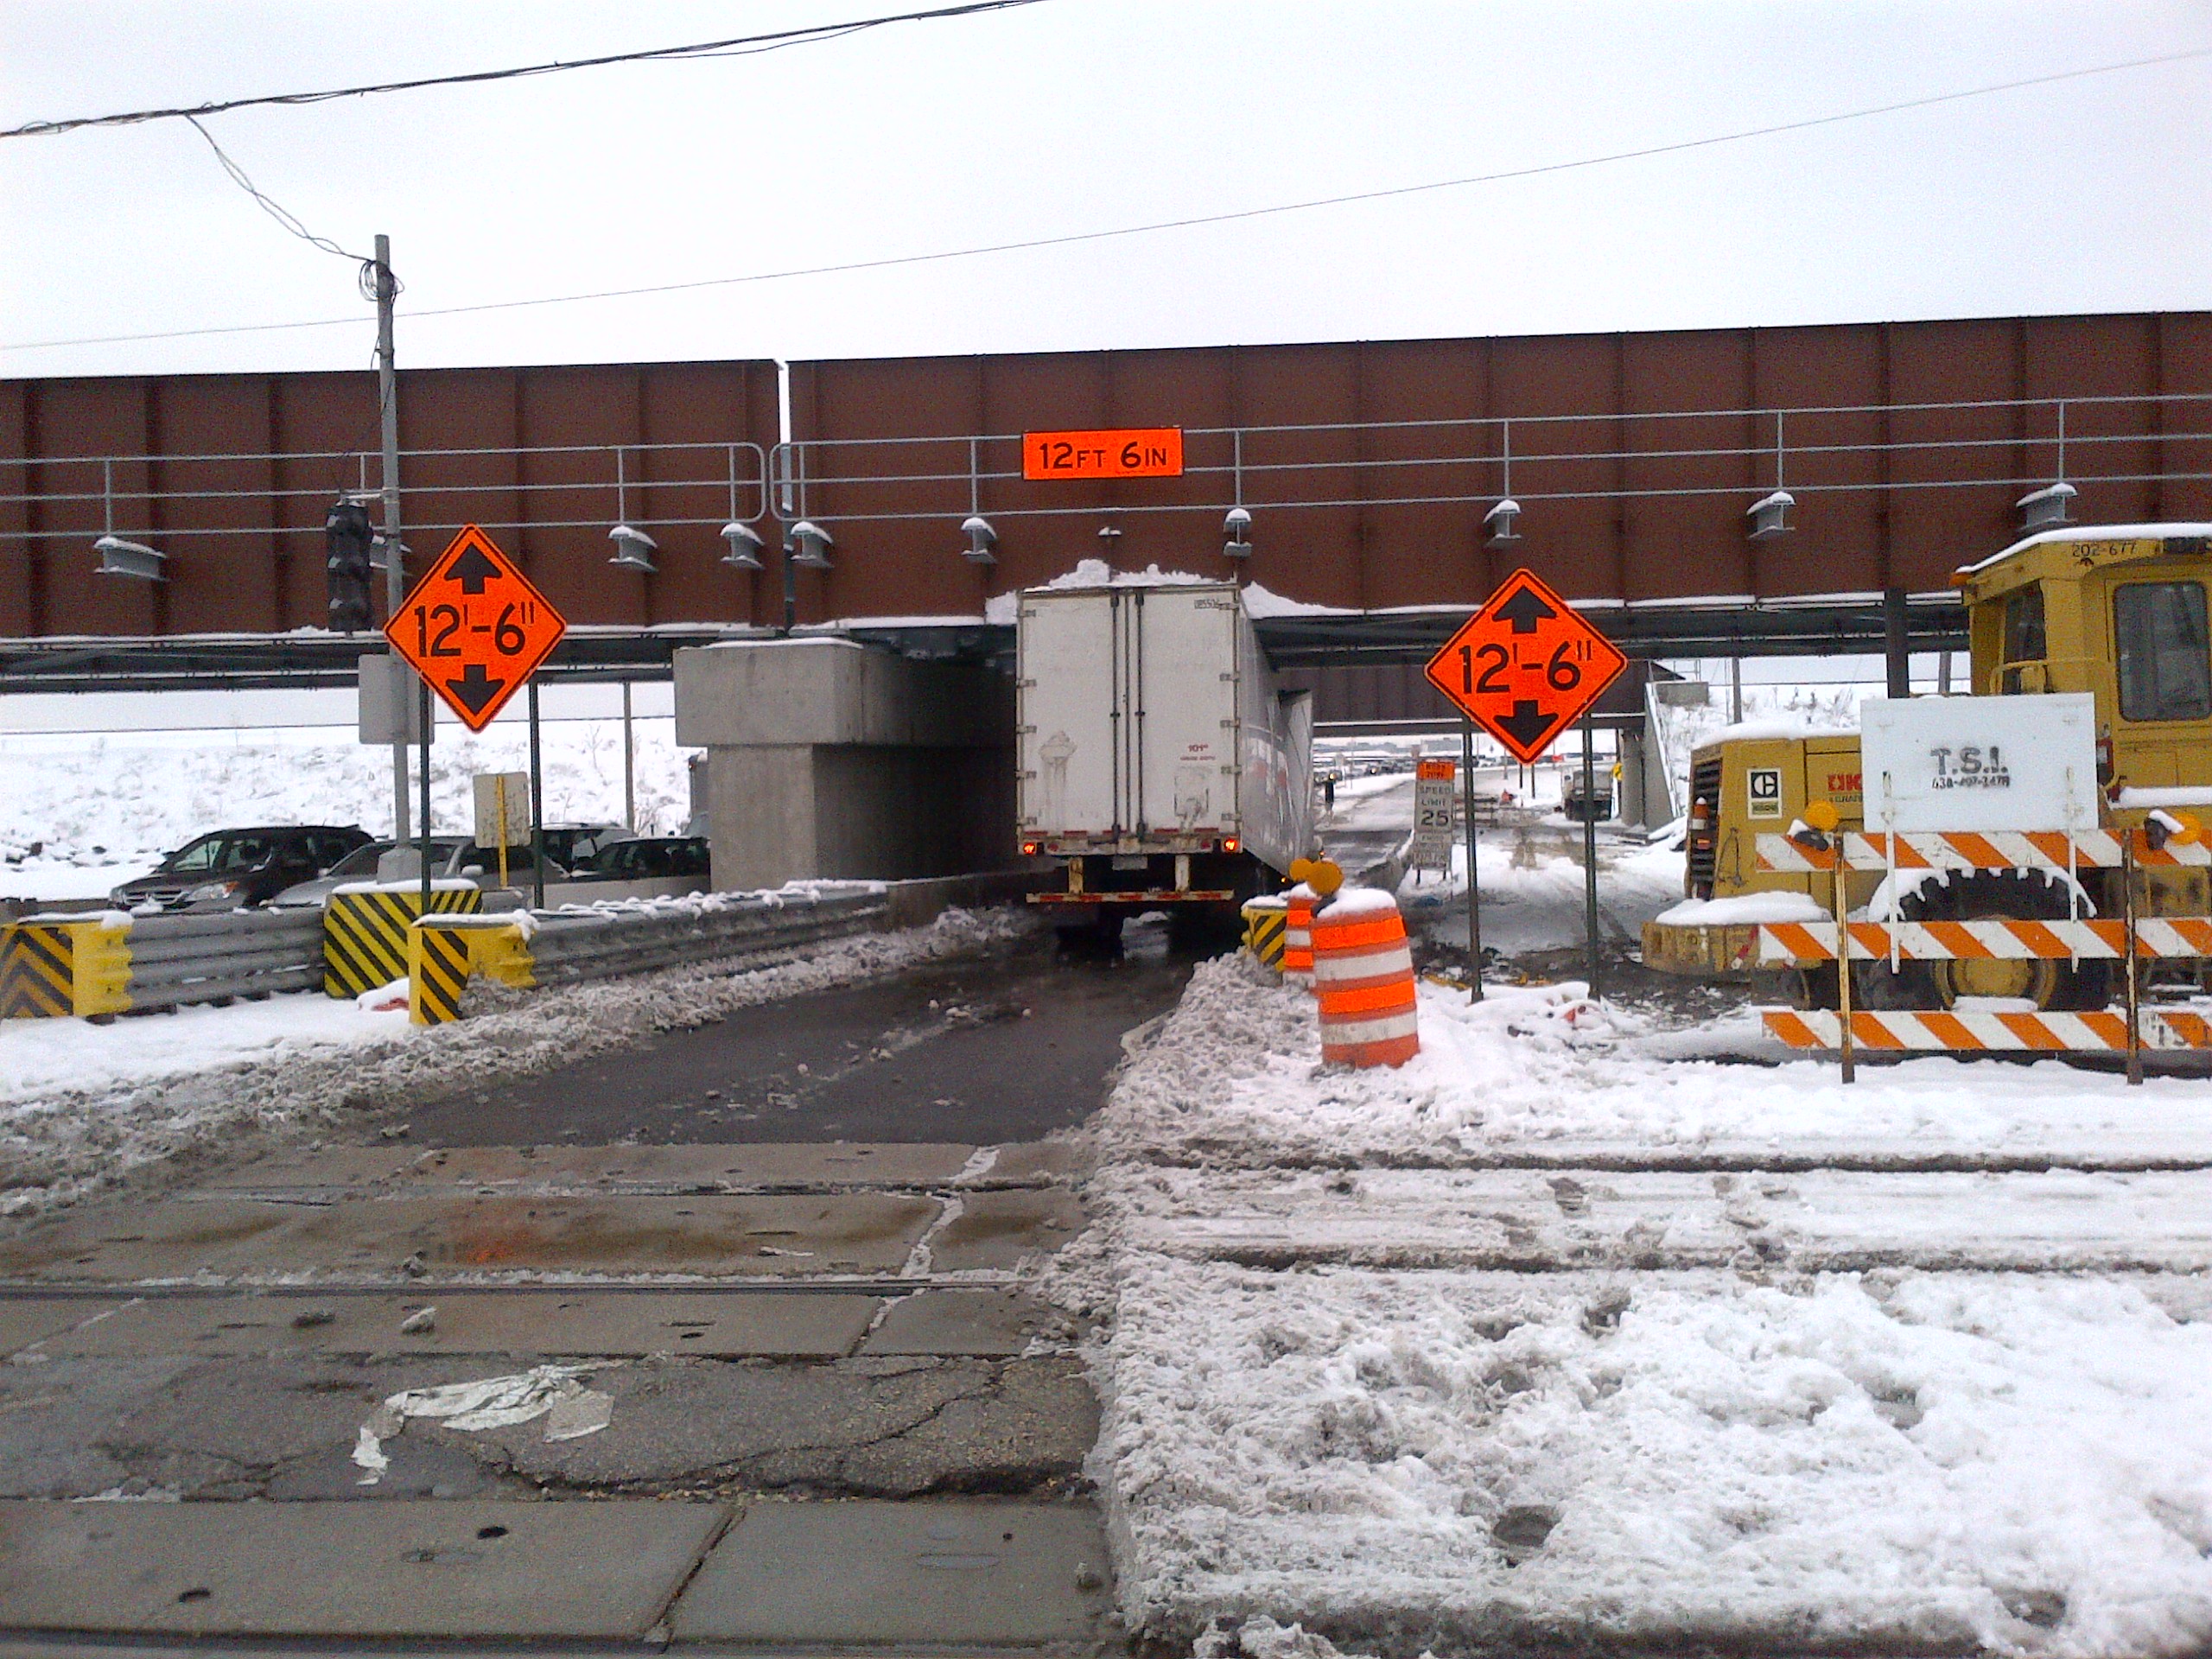
Yup – In total, we counted 18 trucks that made contact with the bridge. After dealing with the situation for several hours, IDOT made the decision to close Irving Park Road to all traffic. The incident made headlines & news reports – Not the kind of publicity you want when you’re a construction engineer, but it happened.
I could (and probably should….) write a detailed chronology about all of the happenings of that situation, especially given some of the negative press that was put out about the incident. But I’ll save that for another time.
Let’s get back to the bridge.
Damage Assessment
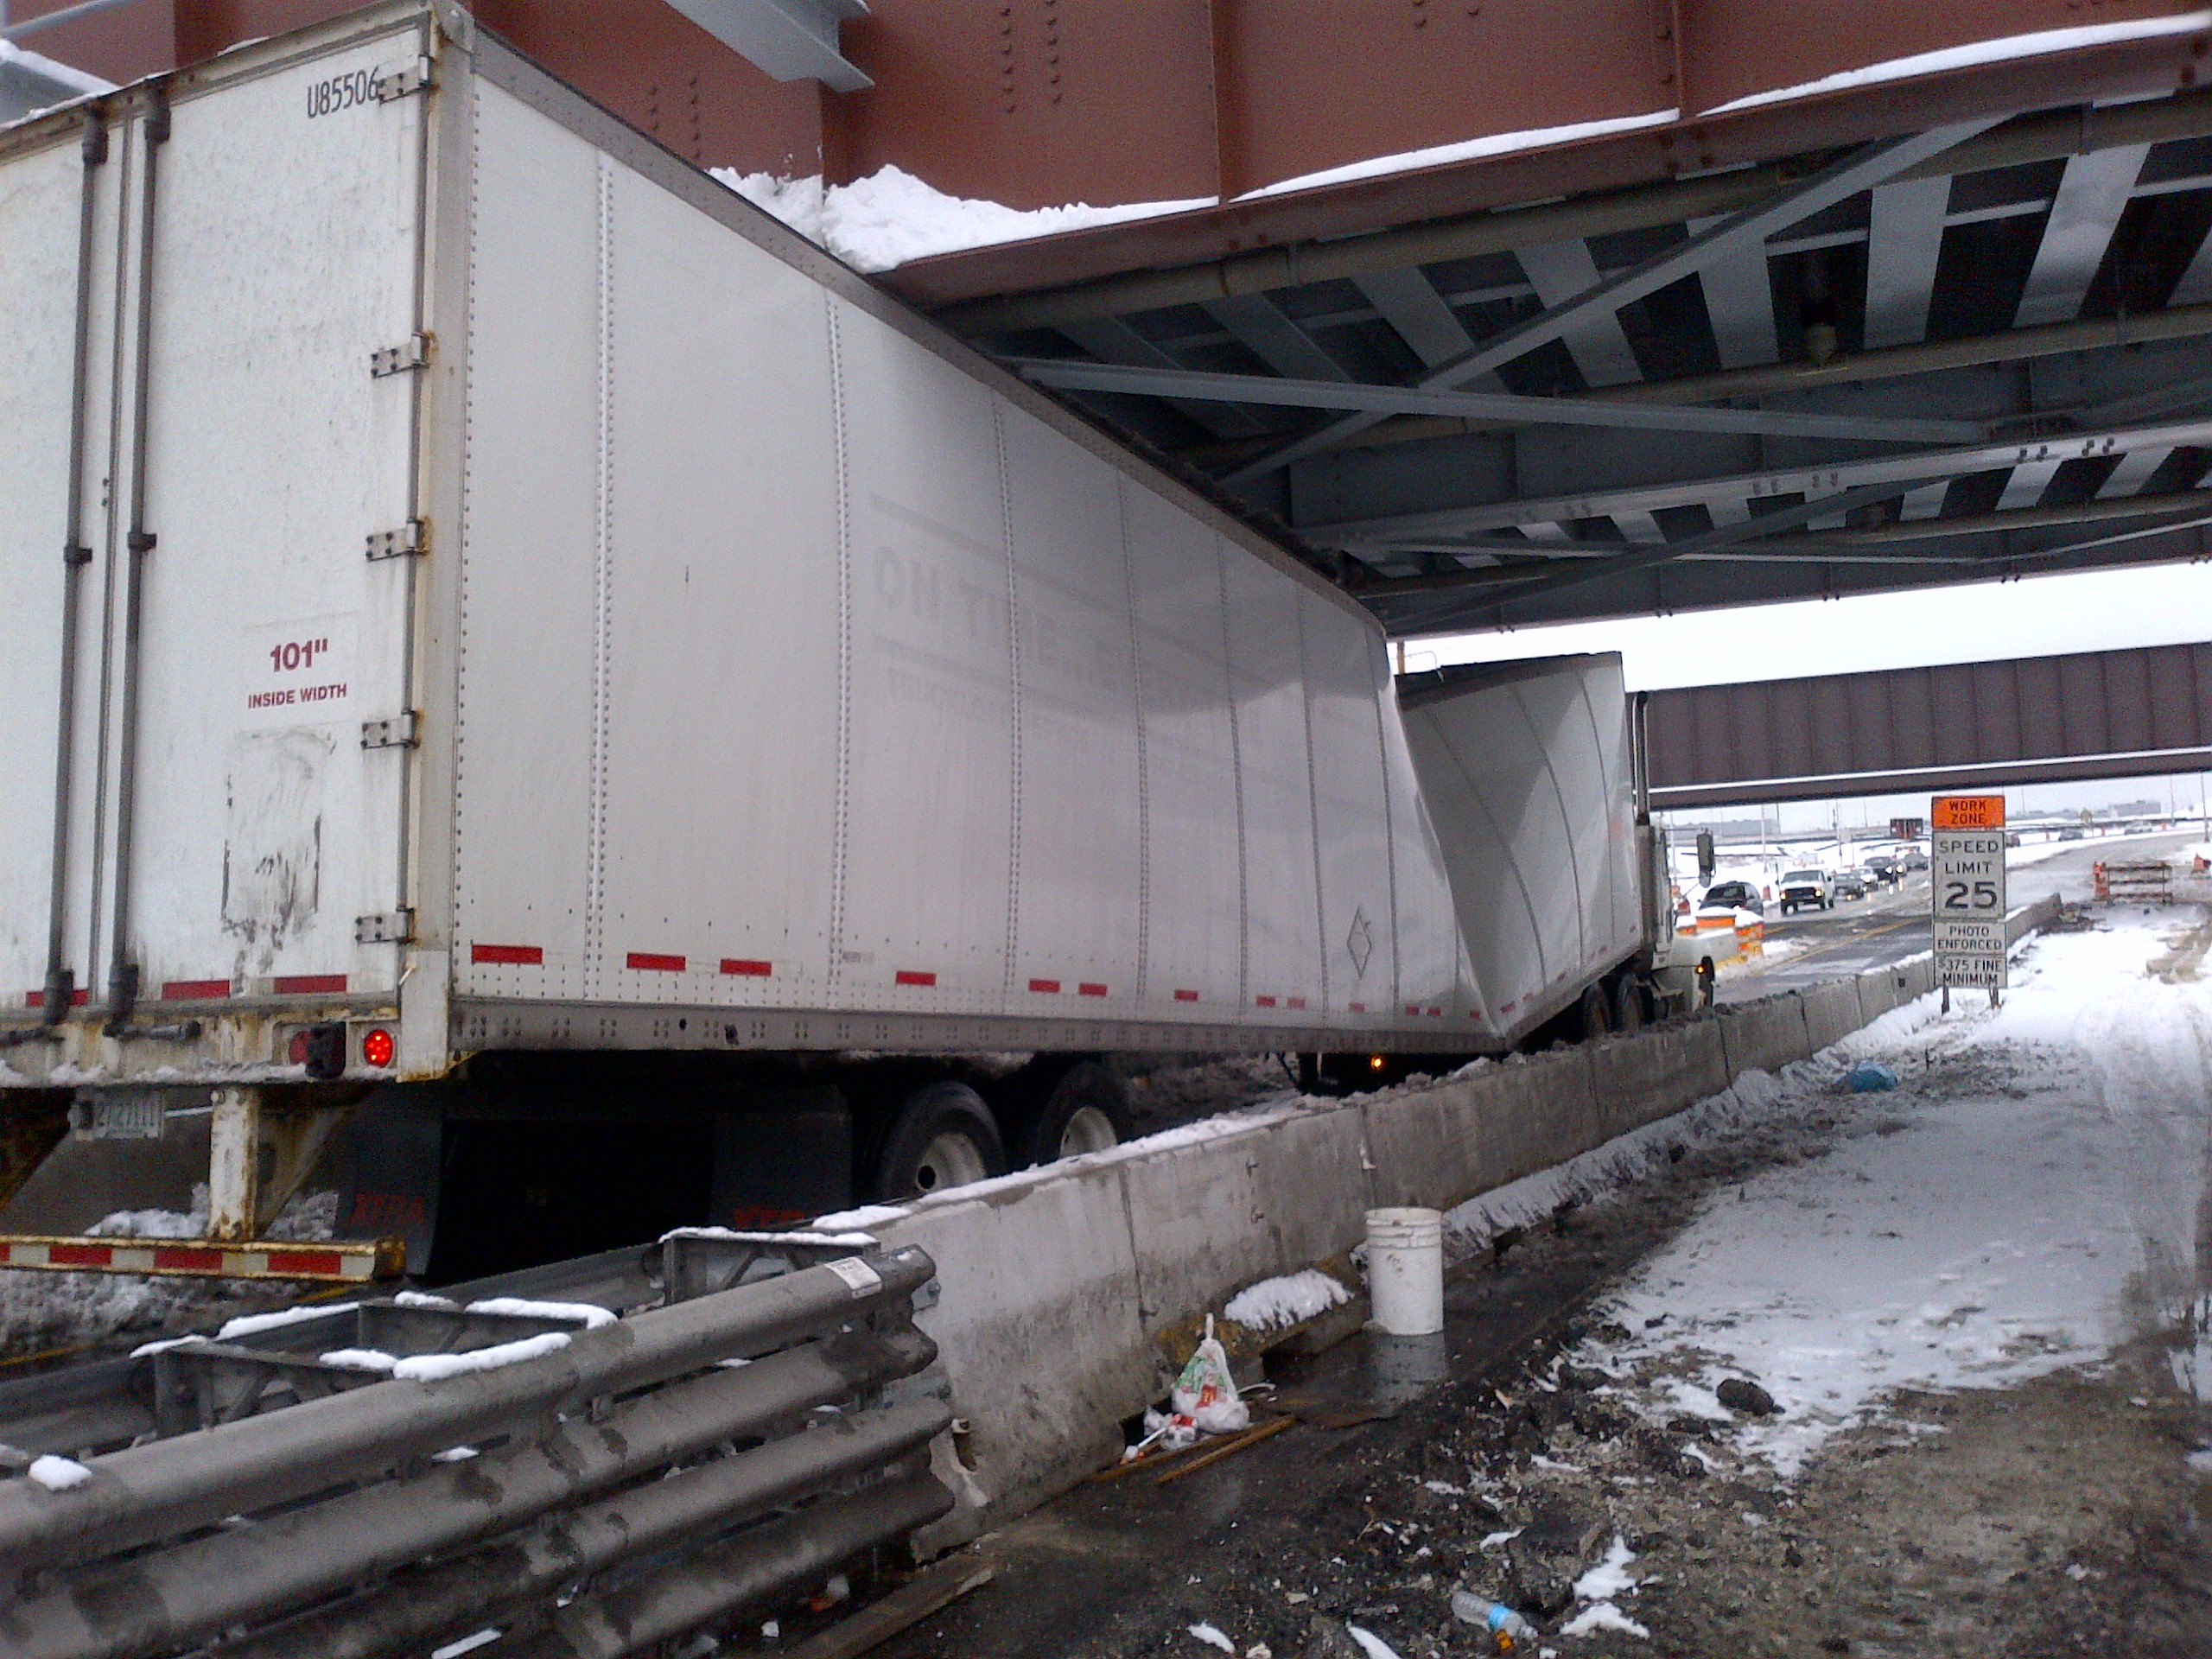
Fortunately for all of us, the bridge was not active when all of the truck contacts were made: We had lowered the bridge that weekend and the trackwork had yet to commence. The bridge was simply resting in-place.
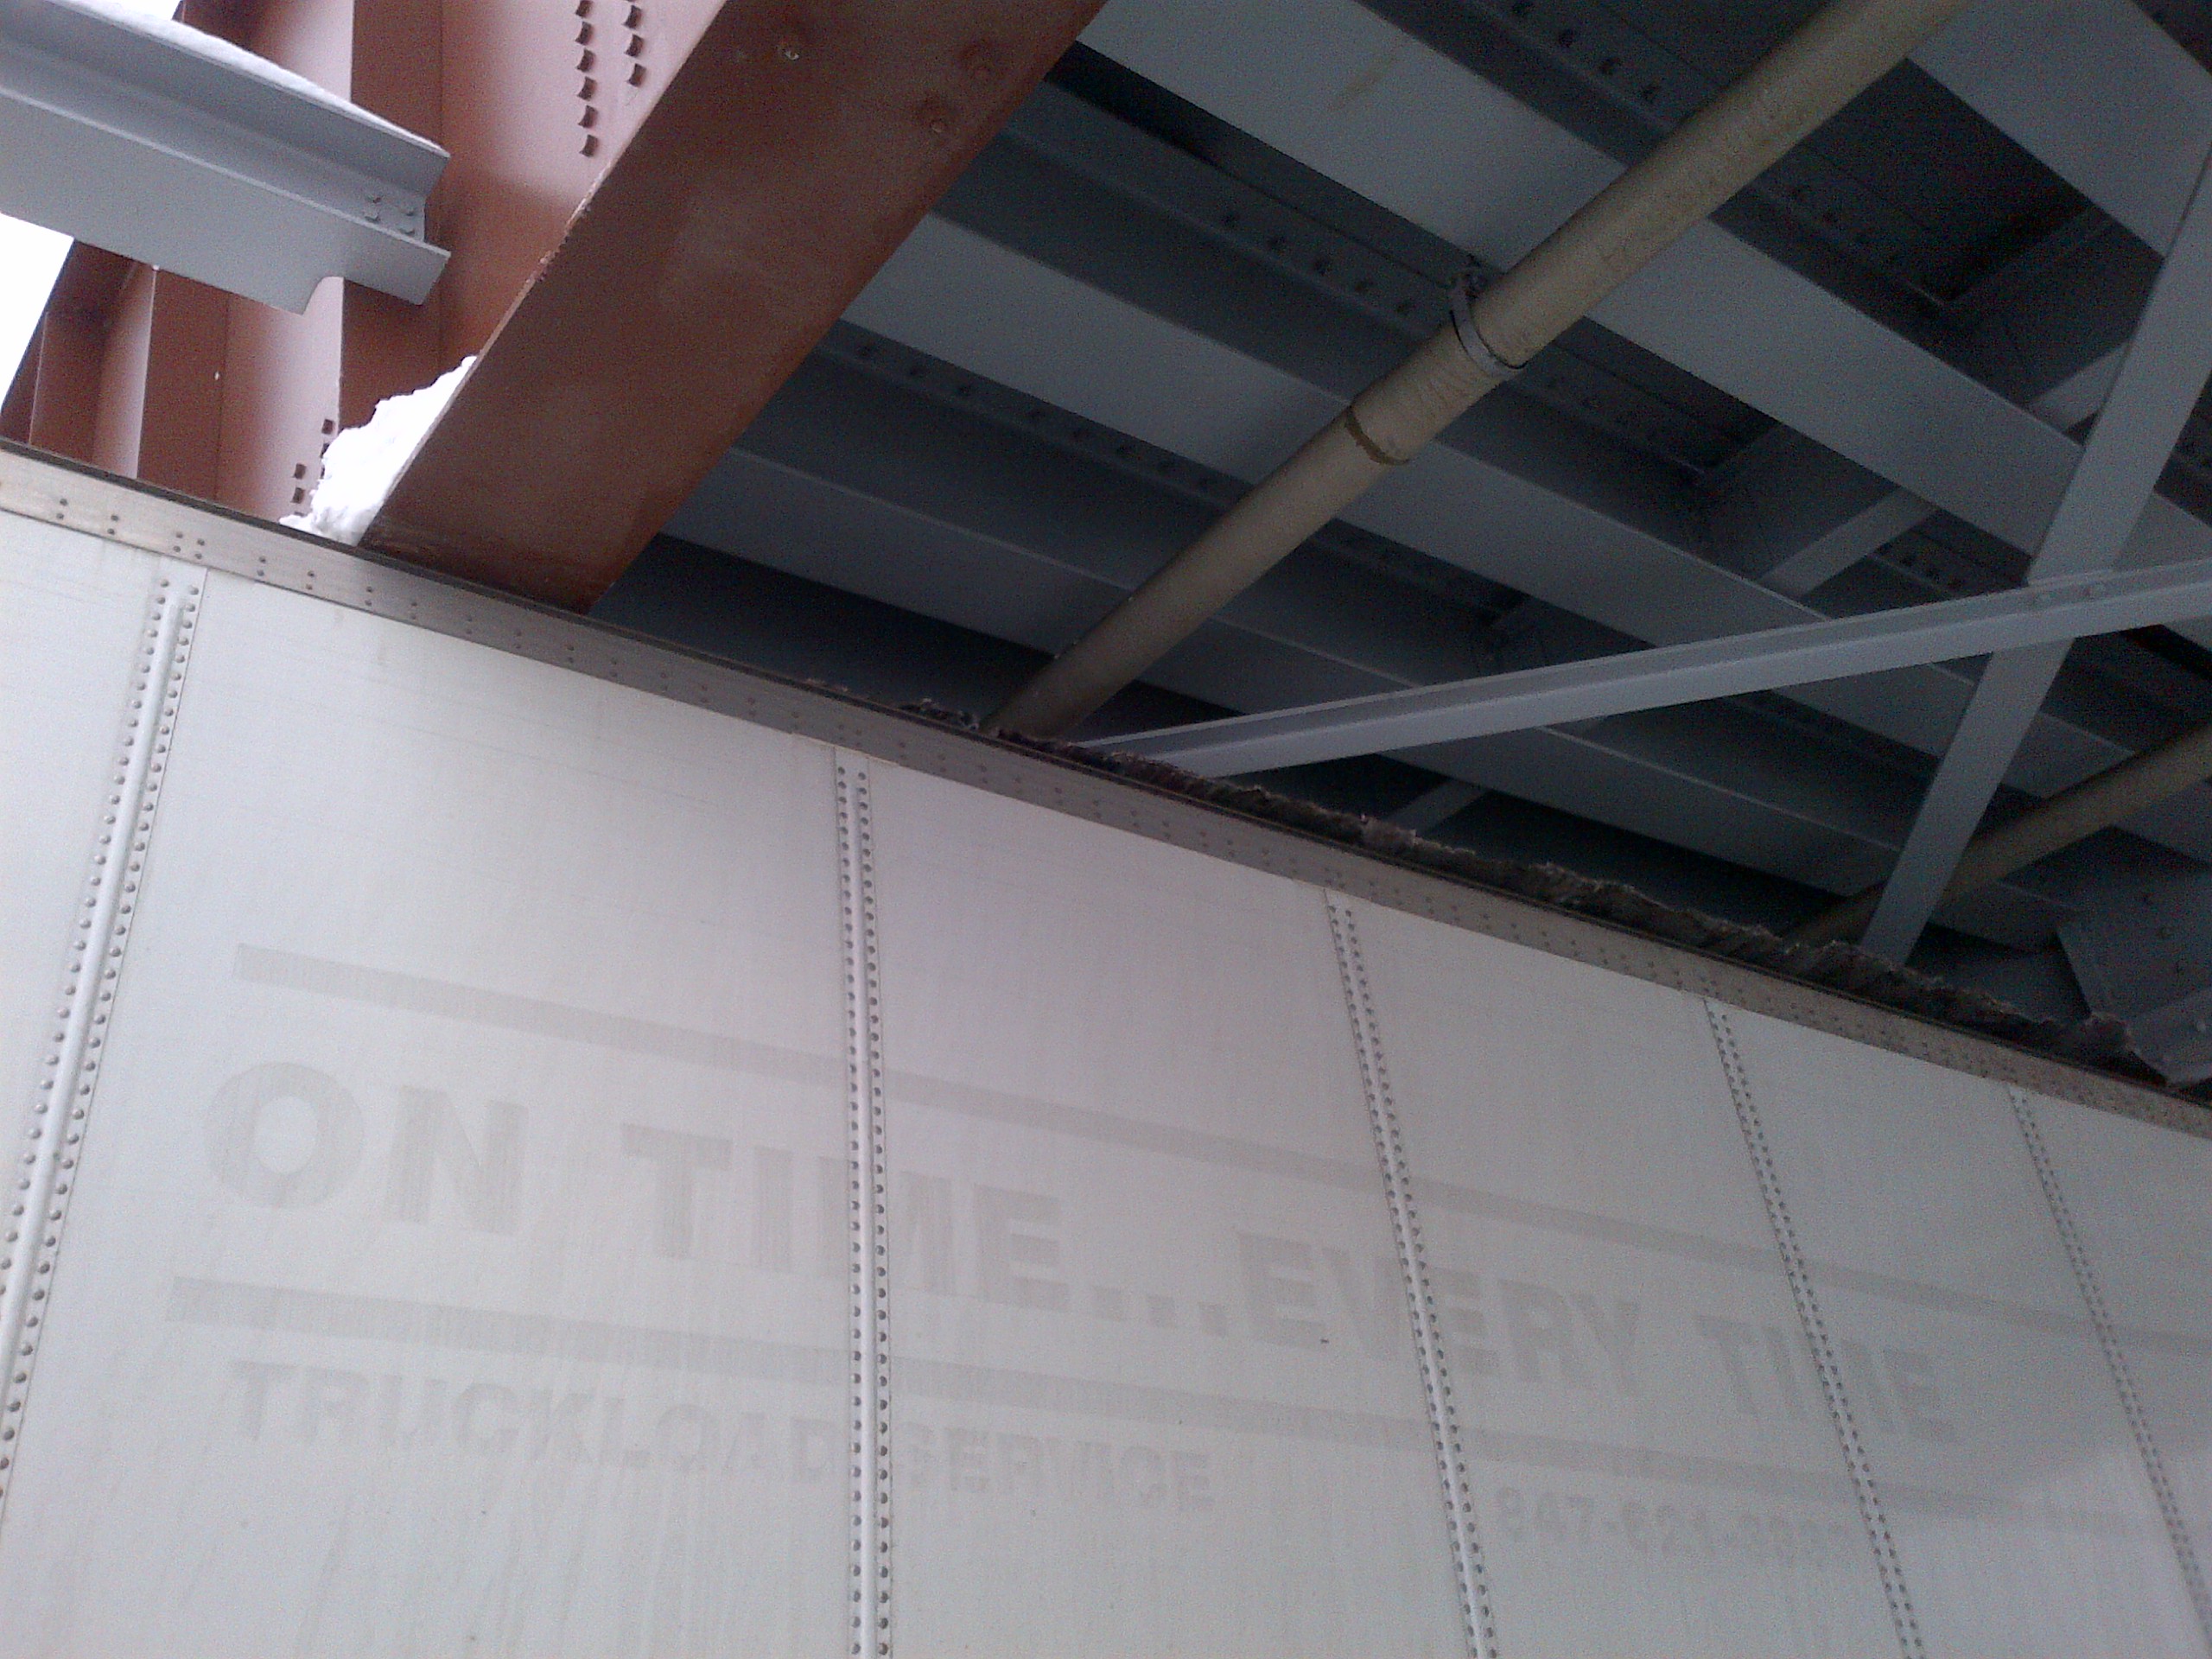
We could see, from ground level, that there was some damage to the west fascia girder. We could see paint damage and some slight warping in the bottom flange under the eastbound lane. We knew we’d need to do a damage assessment.
A few days later, we set-up to do a visual inspection of the damage area.
First thing’s first: This bridge is built to carry trains. In virtually every contact, the trucks that struck the bridge were semi’s with box trailers – The semi-tractors did not make contact but their boxes did. The box trailers that hit the bridge were, well, let’s just say like bugs hitting the windshield of your car – They are aluminum frames, lightweight, and didn’t pack too much of a wallop when they made contact. Our visual findings spoke to that.
We could see some degree of deformation in the bottom girder flange, and a couple of the girder stiffeners had some minor deformation as well. The paint was obviously scarred from the trailer aluminum scrapes when they made contact.

We didn’t see any visible cracks in the steel, but we needed to be sure. So how did we do that? I guess it only took me 19 paragraphs to get to the meat of this article….
Dye Penetration Testing
Dye penetration testing has been around for a long time. The premise behind the test uses 2 different spray-on materials that, when applied properly, make a crack in the steel visible. And it’s a pretty simple test to run once you know how.
We always try to keep a dye pen kit with us in our field offices when we are involved with bridge rehabilitation projects since, often-times, after deck removal, we find girder top flange conditions that need to be checked for cracks. I’ve successfully used the well-known & readily-available SpotCheck kit – We purchased a new kit specifically for this effort.
The process takes a few steps:
First, we cleaned the deformed areas with the cleaner to get rid of the dirt & weather-born debris on the steel. Dave & I were up in a manlift with nothing more than Windex and paper towels.
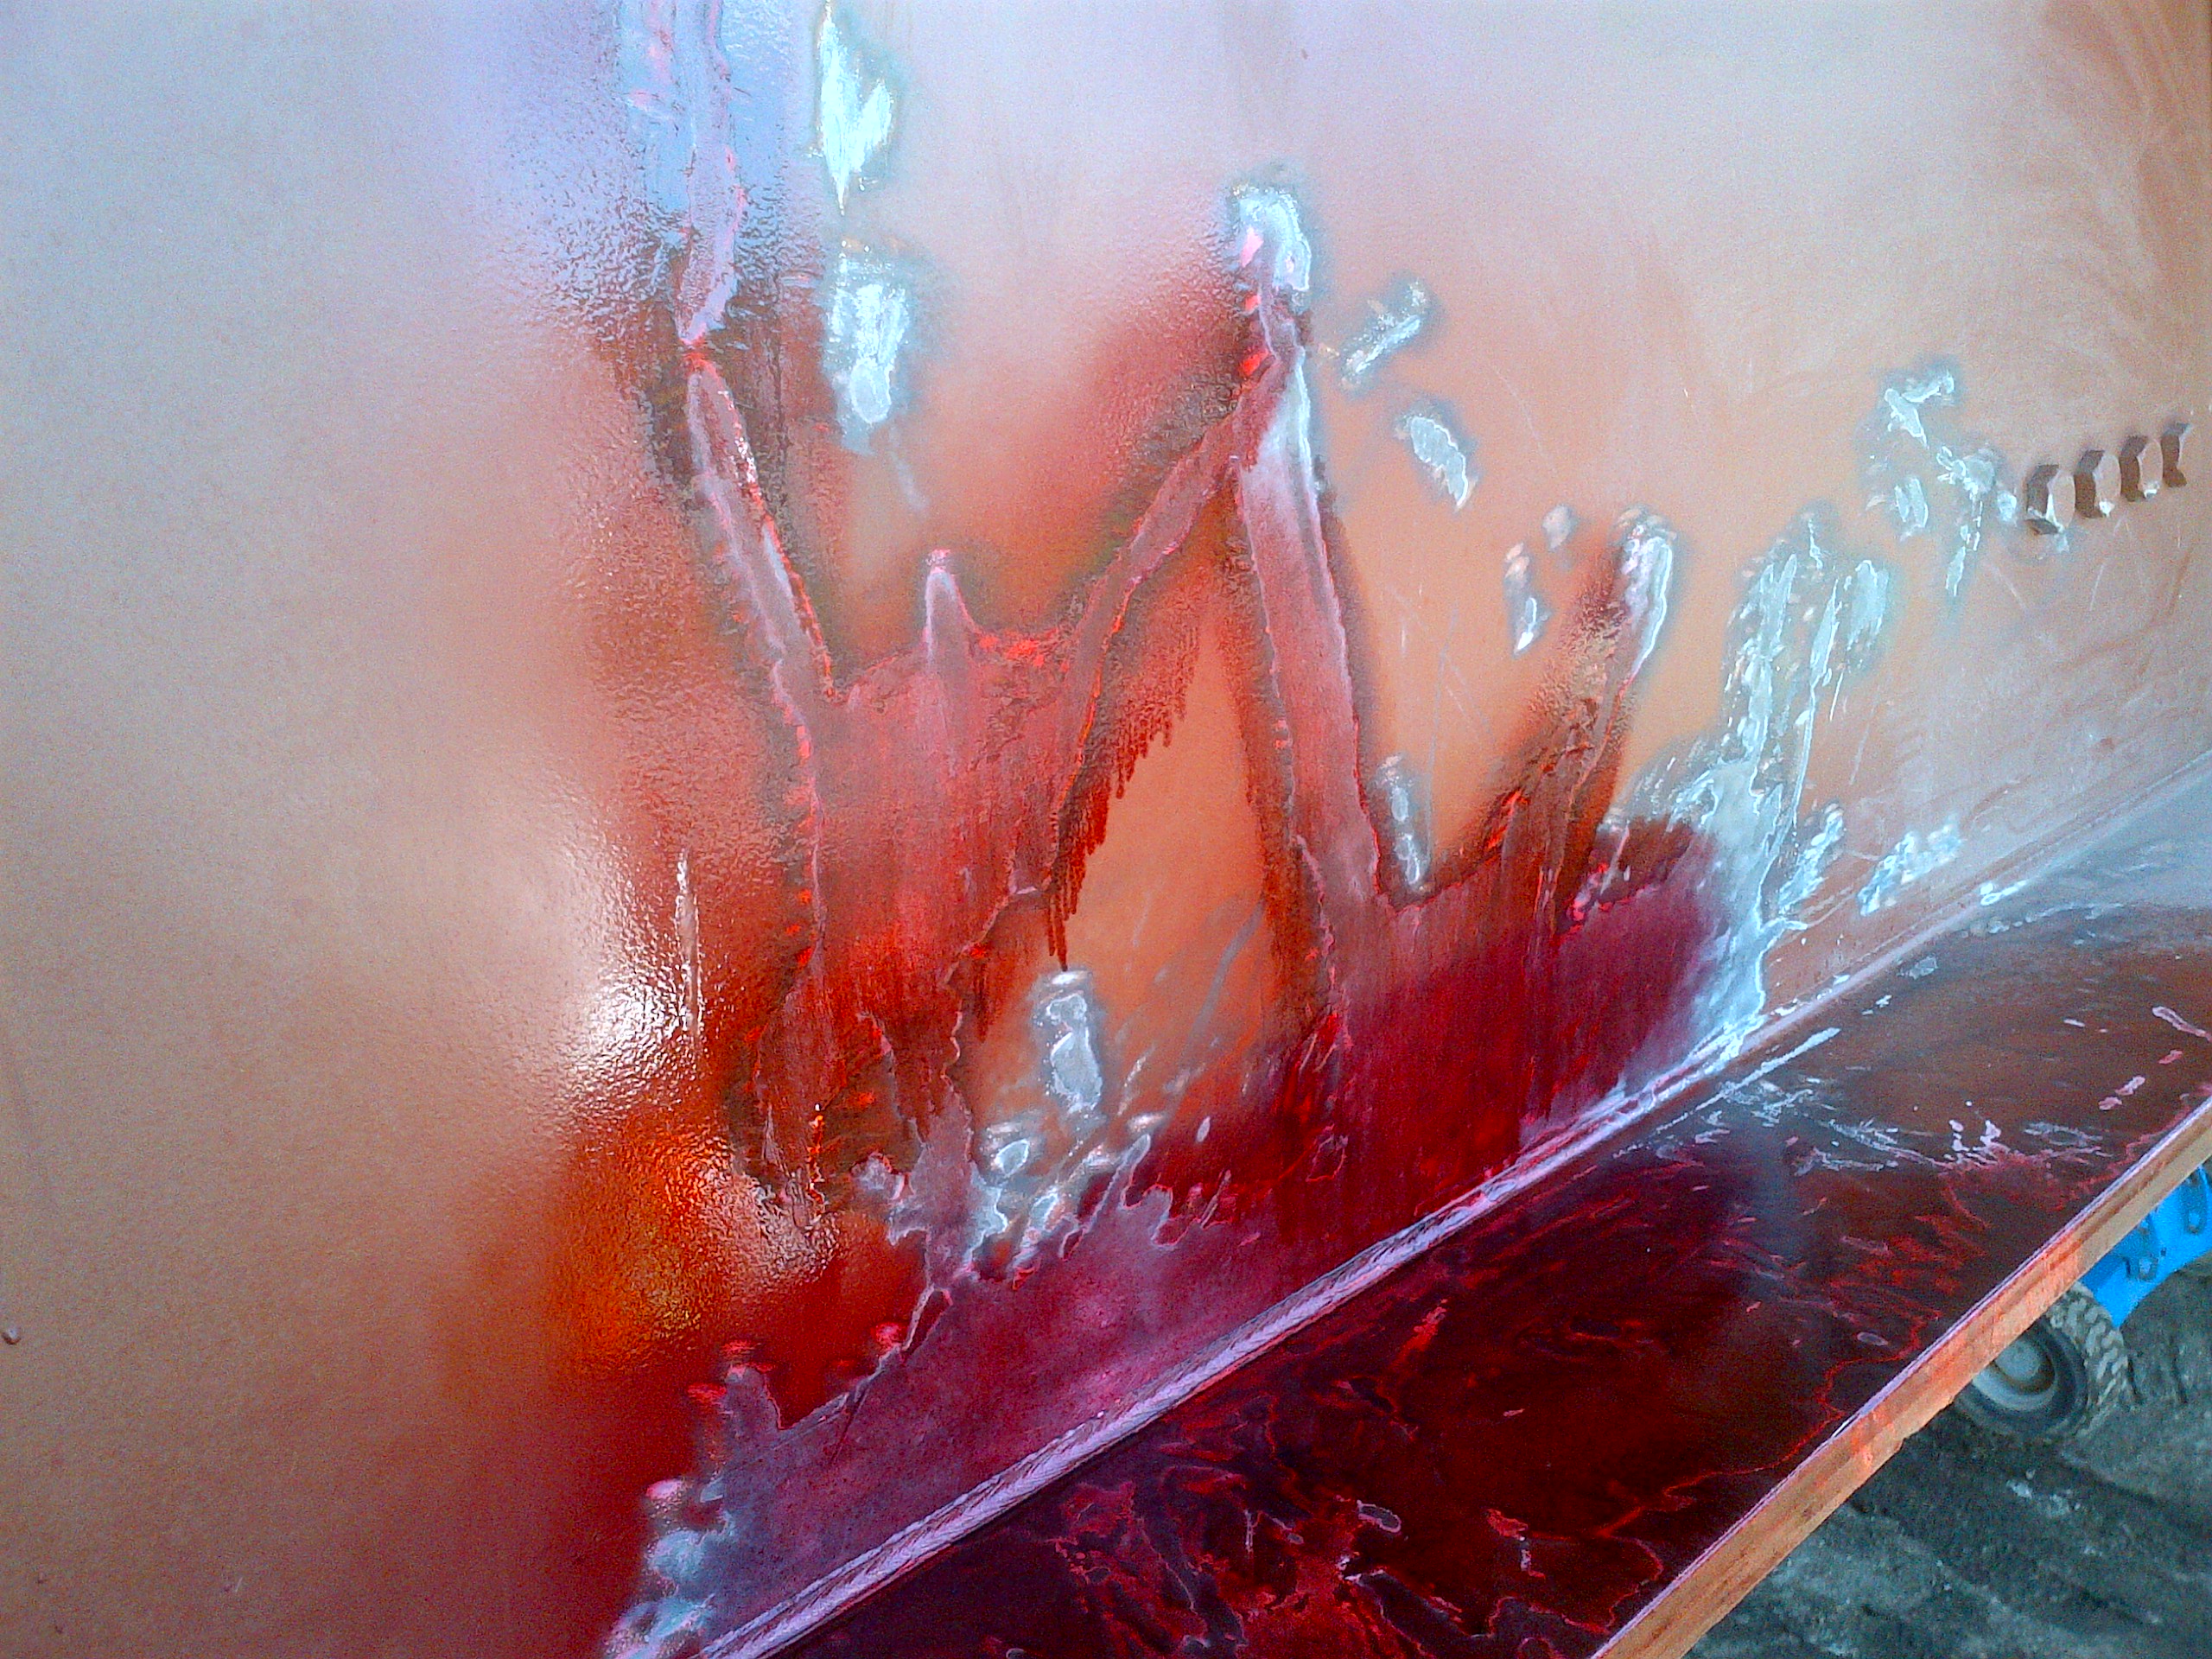
Next, we sprayed on the penetrant. The material is a highly viscous solvent that, essentially, is drawn into any cracks using the principle of capillary action (go get your basic engineer book out if you need to look that one up….).
The next process is the messy one: With latex gloves on and rags in our hands, we wiped off the excess penetrant off the surface. As the capillary action held the penetrant below the surface in the body of the crack, the surface wiping doesn’t effect or “pull out” the penetrant in the deeper crack.
The last step in the process is spraying-on what’s call the developer, which is a white compound that draws any dye penetrant out of the crack where it can be visually seen. Pretty cool stuff.
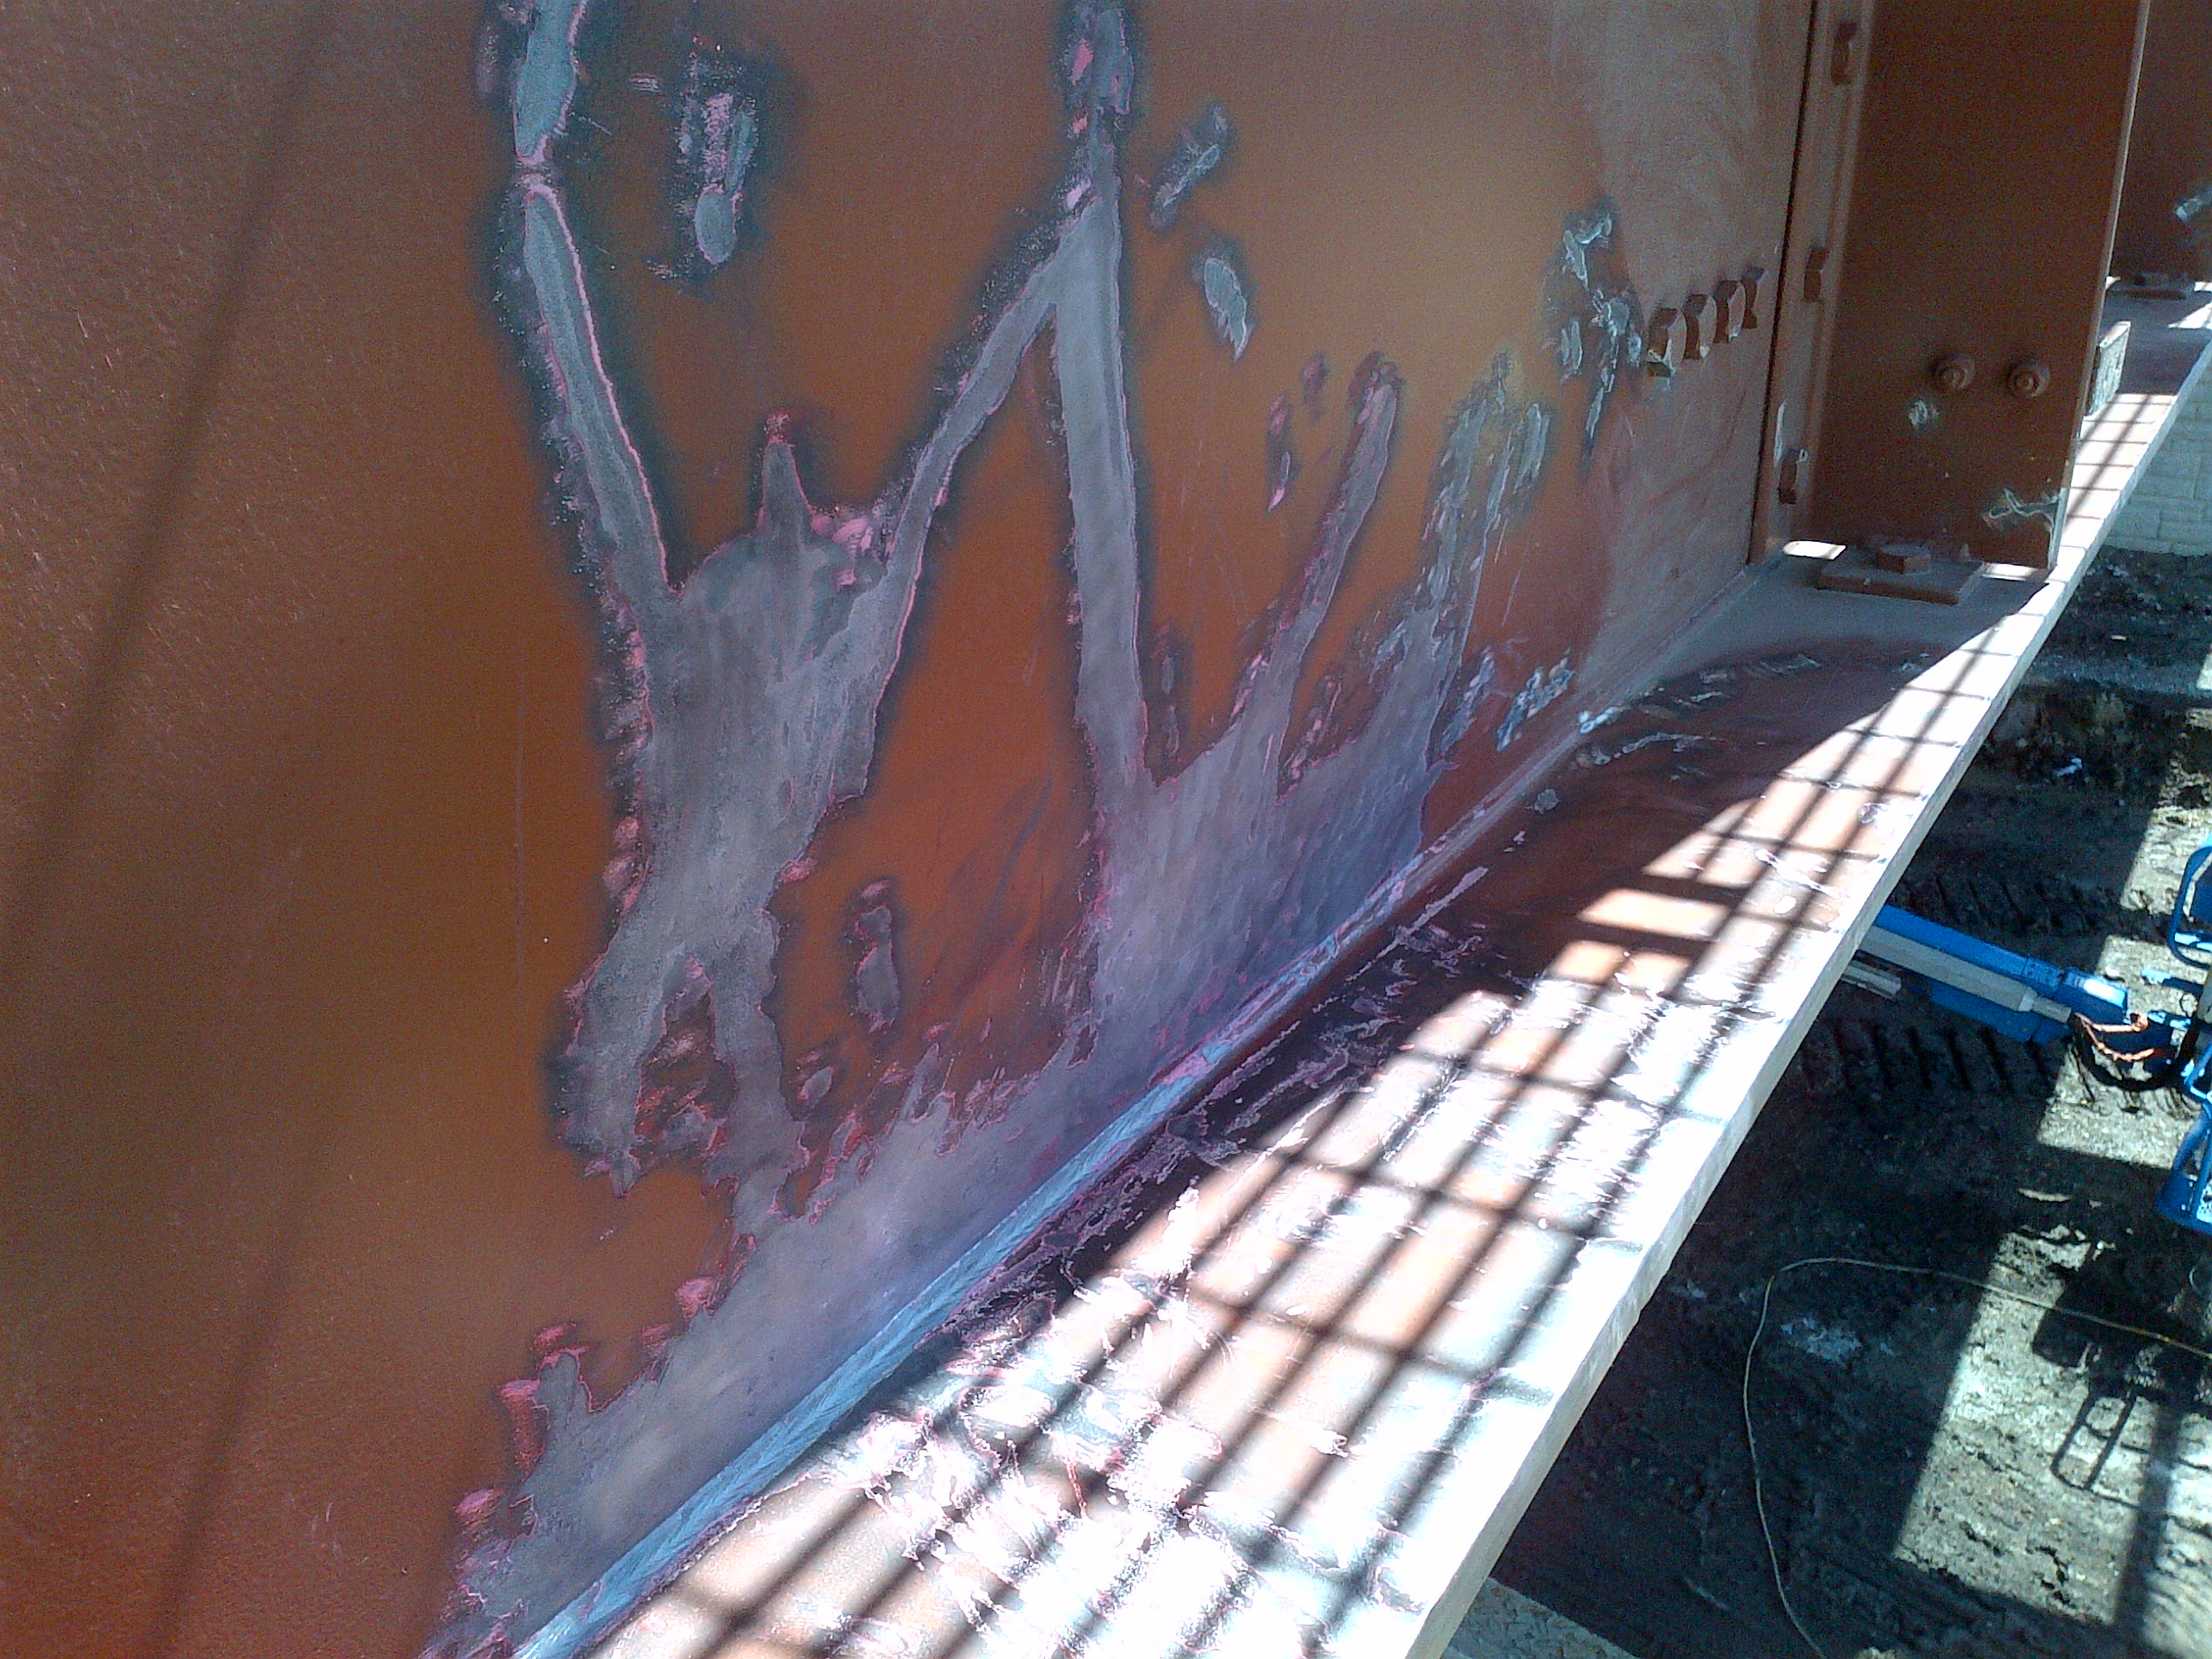
Fortunately for us, we did not find any cracking in our damaged areas. If there were cracks, we would see the deep purple dye lines within the white developer areas.
Final Score: Bridge 18. Trucks Zero.
After Action Items
I’ve included a link to a videos that show how the test is run. It’s pretty straight-forward. But I’ll give you one piece of advice: Don’t let a possible structural issue on your jobsite be the first time you try performing this test – You don’t want your initial endeavor in performing a structural assessment be your maiden voyage…..
If you work for a company that is typically involved in structural steel-related activities, you should have a kit on-hand in your field office. If you don’t, make it a point to get one. Then, take it out for a test run or two. Find some scrap metal, or something on your jobsite that’s been welded and see how you do. Training & knowing how to perform the test before you actually need to implement it are why we train.
Hit me up with any questions you might have – I’m always willing to lend a hand – Cheers!!!

Be the first to comment