In the heavy highway industry, we get the opportunity to work with a variety of construction materials and components. Concrete. Asphalt. Steel. Rebar. Aggregate. Soils. Sewers. Water main. Lighting & wire.
Becoming an expert in All-Thing-Construction is an impossible task. There are simply too many areas of focuses to be an expert.
But, we can be proficient. Knowledgeable. Well-versed. We can know and understand the limits of our knowledge. We can have the ability to know where to look for an answer. We have the will and the fortitude to want to become more-proficient in our knowledge base.
That’s what this website is all about. It is my harbor of knowledge. A small port where I can grab onto a topic and force myself to dig a little deeper. To add a couple of extra tools to my toolbox.
I sometimes wonder if I have enough tools. Do I have too many? Do I have a bunch of tools that are sitting at the bottom of my virtual toolbox getting rusty & dull that I won’t/don’t use anymore. That I’m letting corrode and rot. Is there a point when I’m going to say to myself, “Nope, that’s OK, I don’t need to learn anymore. I’m fine with where I’m at. I’ll just use what I have and that’ll be fine.”
I think that’s the magic of being an engineer – It’s hard to shut the craving for knowledge down. Maybe there are those who can….
But I can’t.
There’s always another book to read. There’s always another calculation or spreadsheet that needs our attention. Engineering is a never-ending set of problems that need to be solved. They may be the same problems that reoccur in slightly different form. But when we have the opportunity to solve them, we carry out our duty and our purpose.
I say it often: I’m jealous of guys and gals who get to work with their hands everyday. The tradesmen on our projects can step back after a paving pour or a run of guard rail and tangibly put their hands on their product. There is a chunk of something that they have put into the world that we can see & touch.
As an engineer, we aren’t afforded that ability. Our work product is an answer. There’s nothing glamorous about an answer. There’s no real tangible outputted widget that we can point to and say “Look what I made.” Sure, we can point to a computer screen. We can print out our answer on a piece of paper. It’s just not the same…..
So how do we derive satisfaction in our output? Is being an engineer simply a 40 year grind of solving problems with little or nothing to show for it? Or can we take some small piece of credit with a retaining wall is built? Is it OK for me to drive through a section of expressway that I’ve served as an engineer on and take credit for it? Can I tell my wife or my kids that I worked on it? Or do I tell them that I pushed a lot of paperwork and sat through a bunch of meetings while there were guys and gals in the field actually building it?
I think I’m a pretty humble guy. I don’t often think of myself as someone who’s made a difference in our industry. I think, by nature, the vast majority of engineers I know are of the same mindset. We are the quiet professionals working behind the scenes of a construction project who keep fire in the furnace. Nobody really sees what we do. They see guys in white hard hats on projects doing a lot of standing around. They can’t see the equations running through our heads. They can’t see the pressure relief valve teetering. They can’t see the mountains of administrative paperwork & emails and documents that we are responsible for.
So why the long-winded diatribe today?
I’m going to roll-out a topic that is near-and-dear to me because I love grinding into the details:
Bolts.
Wow. That sounds exciting, doesn’t it (said with a low-murmured groan…)?
I want to introduce you to a construction inspection reference that one of my co-workers, Keith Chernick, introduced me to. The reference pointed me in a direction that FINALLY got me a firm answer a question that has been driving me crazy for over a decade now:
What are the requirements for tightening sign structure anchor bolts?
Heading Back to 2008 on I-55
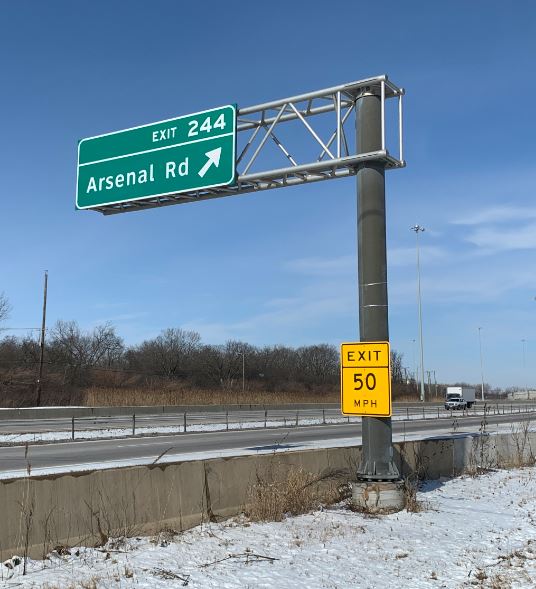
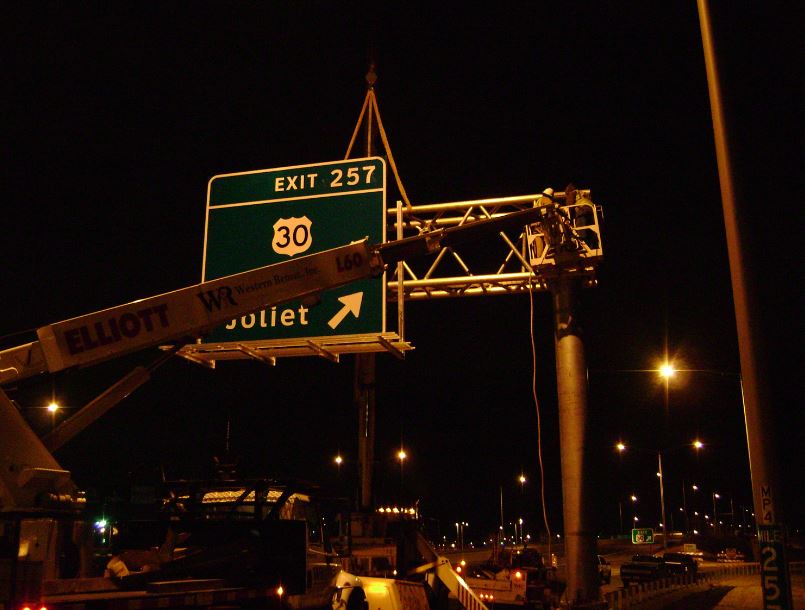
So the subject of tightening anchor bolts, and specifically anchor bolts for overhead sign structures, crossed my path in 2008. As part of our work for the Illinois Department of Transportation widening interstate I-55 though Plainfield, Illinois, we installed a couple of cantilever sign structures.
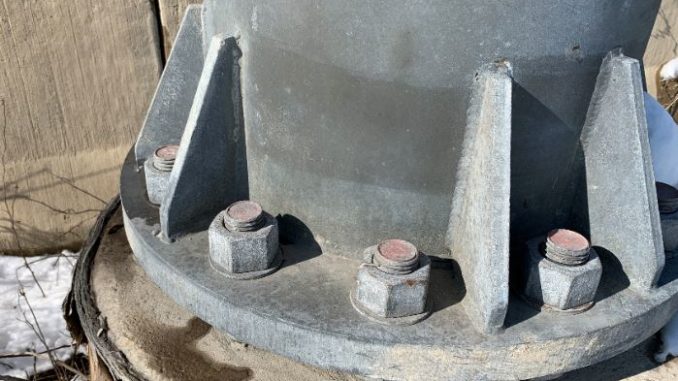
The anatomy of a cantilever sign structure is a simple one: It’s a tubular sign truss and post set on a drilled shaft. The structural post is set & secured onto the drilled shaft in anchor bolts that are cast into the drilled shaft.
Let me say this: I hate drilled shafts. They are a pain in the ass. I can’t really think of any drilled shaft work that I’ve been involved with that has gone smoothly, or smooth-enough for me to change my mind about how much drilled shafts suck.
At the time, my boss and mentor, Dennis Schrock, was our “Mr. Drilled Shaft.” For all of my disdain for drilled shafts, Dennis was the exact opposite – Dennis LOVES drilled shafts & caissons. Dennis is from the old school and spent many an instance being lowered down caissons to do inspections of the bells.
So Dennis willingly volunteered to be our eyes-on for the sign installation.
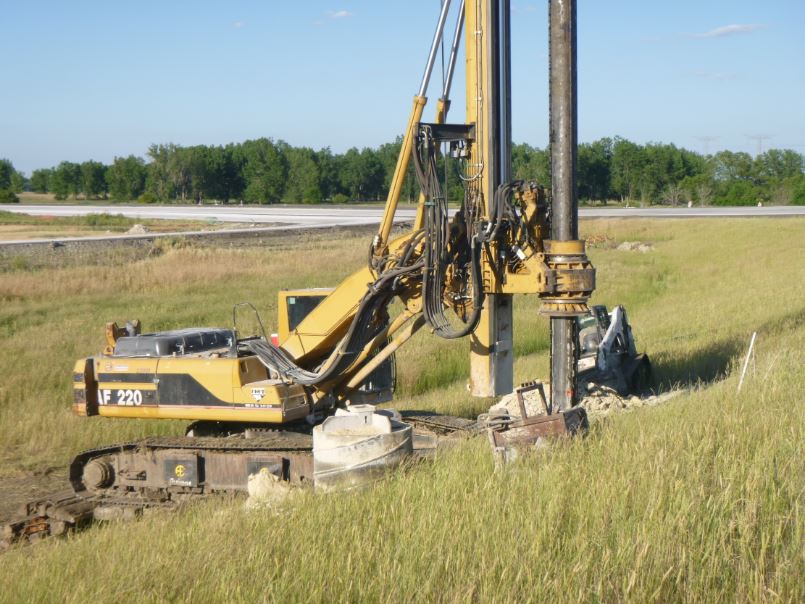
The drilled shaft installation was a bumpy ride – The contractor struggled with ground water control and temporary casings (which, by the way, is a common angst during drilled shaft work….and another reason why I hate dealing with drilled shafts, but we’ll save that for future articles….). Eventually, the contractor got the shafts installed.
I digress – This isn’t an article about drilled shafts.
When it came time for the signing contractor to install the structural post, Dennis went to work. I remember vividly Dennis’ inquisition with the contractor: We needed them to provide a torque wrench so we could check that the anchor bolts were being were being tightened to the correct tension.
So, what were the tightening requirements for the post anchor bolts on the drilled shaft?
At the time, in 2008, I had to, rather, I HATED to admit – My answer was “I don’t know.” Engineers HATE saying “I don’t know.” It’s like kryptonite – We are ALWAYS SUPPOSED TO KNOW!!
So, here’s the quiz and the basis of this article: What are the tightening requirements for overhead sign structure anchor bolts?
This is a great jumping off point – Let’s talk about tensioning bolts.
Bolt Tensioning 101
To discuss bolts, we first need to get into some rudimentary details. Terminology & understanding are keys to learning. If you are already proficient in bolt basics, feel free to skip ahead in the article (I won’t be offended…).
There are a couple of different forces that we need to differentiate when we talk about bolts: Tension and torque. You’ve probably heard the term torque a lot more than you’ve head about tension: Nobody goes to the hardware or auto store and looks for a “bolt tensioner,” you are looking for a “torque wrench,” right? Aren’t they the same? I’m torqueing a bolt, I’m not pulling on it, right…?
Hmmmm…..
When we use a bolt, we are essentially trying to compress something. We thread a bolt through a hole and tighten the nut. This action forces the nut and the head of the bolt compress whatever is in between them. That compressive force is counteracted by the tension that is being applied to the bolt stem. The bolt stem needs to be strong in tension to hold the assembly together.
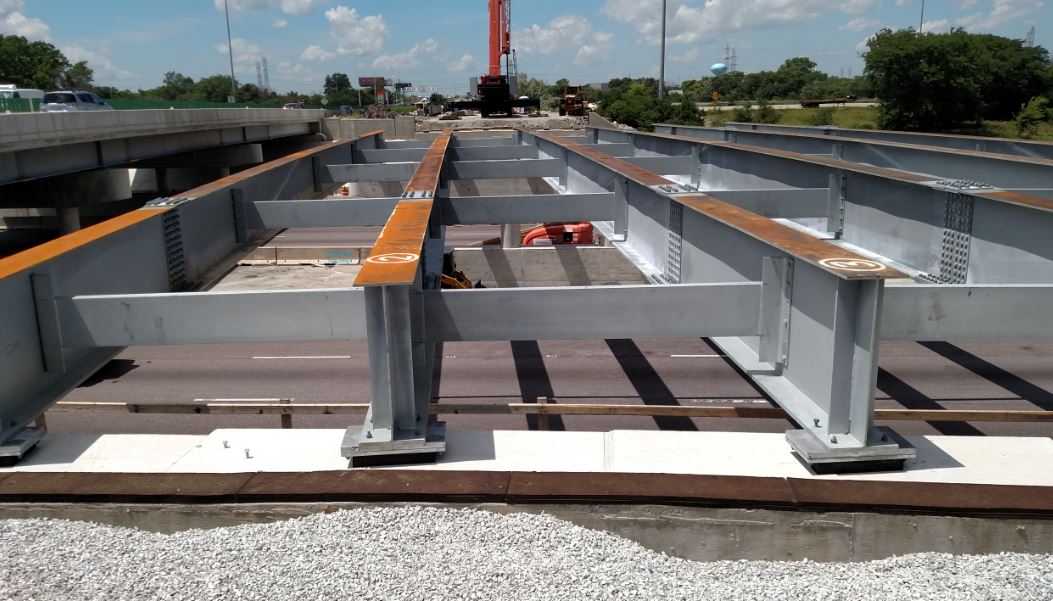
When we assemble structural steel, we use bolts to develop compressive forces between the plys of steel to hold them together. Bridge girder splices, for example, are sized by structural engineers who calculate how much compressive force is required to hold the plates together whereby determining the number of bolts necessary to make the connection function correctly. The splice plates are held together by the tensile properties of the bolts.
But that’s not torque. I use a torque wrench to tighten bolts, right? Isn’t it the same?
Nope.
Torque
So what is torque? In layman’s terms,
Torque is the rotational force that we apply to the nut that results in tension being applied to the bolt.
From a structural standpoint, we need tension in the bolt to secure the connection. The torque being applied to the nut develops that tension.
So when we are tightening something, we want to develop tension, so can’t I just read what’s on the torque wrench?
This is where most people get tripped up…..
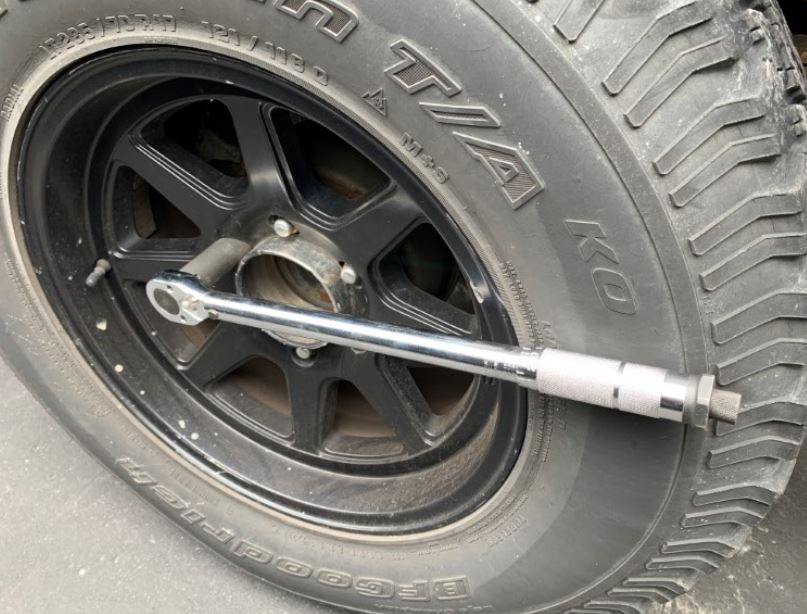
One of the most common applications of using a torque wrench is when you put lug nuts on your car’s wheel. Manufacturers will provide you with the required torque for your wheel and lug nut.
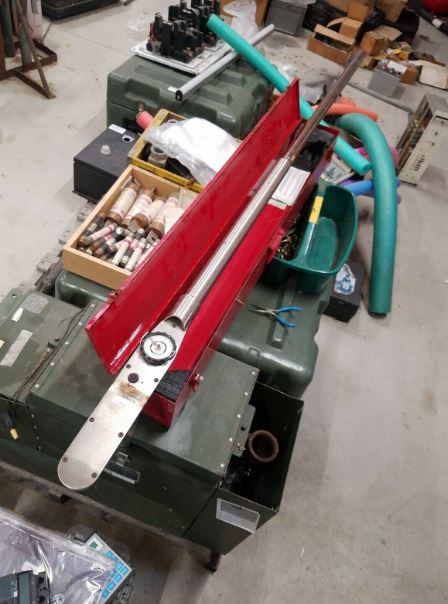
To properly install the lug nuts, we can head over to Harbor Freight Tools and pick-up a torque wrench. On the wrench, you will see a dial that is graduated and allows us to set the torque wrench to the foot-lbs the manufacturer requires. Let’s say, for example, our recommended lug nut torque is 75 ft-lbs. We set our wrench accordingly, spin our lug nut on – Once the torque wrench “clicks” we know we are at 75 ft-lbs and we are done.
So let me ask you some questions:
- What was the condition of the lug nut when you put it on the hub? Did you lubricate the threaded wheel stud? Were they rusty? Did you wire brush them?
- How easy did the lug nut go on the stud? Did you hand tighten the lug nut, or did you have to kind of crank on it to spin it?
Let me push this a bit further:
- What if you didn’t clean the wheel stud or you didn’t put any lubricant or anti-seize on it before you put the lug nut on?
- What if you just left the rust and road grit on the wheel stud and just put the dirty lug nut on the corroded wheel stud? Would that change the amount of force you’d need to apply to the lug nut to spin it on?
You bet it would. It would take you different torques to spin the lug nuts onto the wheel studs depending on the physical conditions of the materials.
The wheel doesn’t care how hard you needed to spin the torque wrench to make the lug nut apply the tensile force, it only cares about tension developed between the wheel and the wheel hub to hold it in place. But we can’t readily measure the tension, we can only measure the torque, right?
So now we get to the root of things: A torque wrench is a relative gauging device for providing empirical results of bolt tension. A bolt torque measurement is just a correlation of bolt tension, but it is not a precise measurement.
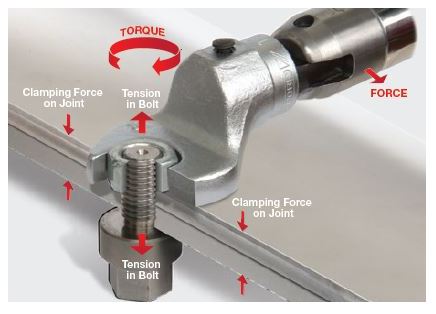
And this is what makes a lot of engineers stumble: You cannot simply take a torque wrench out onto the site, set it to a gauge reading, crank on it until it clicks, and know that you have applied the proper bolt tension. You can get in the ballpark with a correlated reading, but it’s not exact. Having this understanding is a key component of talking about structural bolting.
Question: Is there a way to correlate bolt torque to bolt tension? Yes, there is. (I hope the colored text helped…).
The Skidmore-Wilhelm Measuring Gauge
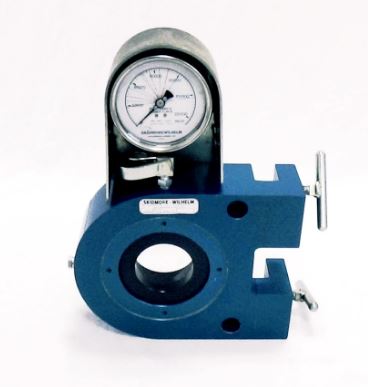
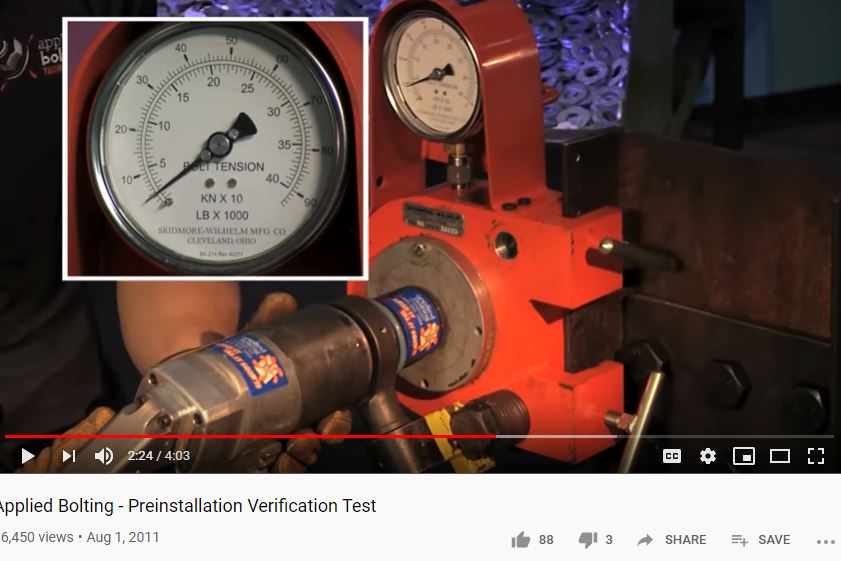
One of the mesuring devices we use to test bolts in the field is called a Skidmore-Wilhelm bolt tension measuring gauge. The device allows a bolt to be inserted and tightened, and it reads the compressive force being applied by the bolt on the plates within the apparatus. The compressive force being “sqeezed” provides us the resulting tensile force that the bolt is resisting. If you are using a torque wrench during this tightening, you have the ability to simultaneous determined the torque being applied by the wrench and the resulting tension that is being realized by the bolt.
A Skidmore is a standard measuring devices that we use in the field for testing bolts prior to their use in structural connections. (We won’t get into the testing procedure in this article, but I will give you several links to outstanding resources that discuss the procedures at the end of this article).
Back to Anchor Bolts
So now, since we have an understanding of the differences between torque and tension, let’s get back to anchor bolts: How do we tighten anchor bolts? And more importantly, how do we know that we’ve tightened our anchor bolts to the correct tension?
Let’s go back to the overhead sign structure situation that I started the article with: What is (or was, in this case….) the proper bolt tension for the I-55 overhead sign? And what torque wrench reading was required?
The FHWA’s Publication No. FHWA NHI 05-036 – Guidelines for the Installation, Inspection, Maintenance and Repair of Structural Supports for Highway Signs, Luminaires and Traffic Signals gives us the guidance we need.
This is an outstanding manual and one that I printed hard copy excerpts for myself to keep in my Brain Book. If you are getting involved in the erection or inspection of overhead sign structures, I don’t think there is a better guide book for you to use & refer to.
All bolt installations that we deal with in structural applications are specified in the Specifications for Structural Joints Using ASTM A325 or A490 Bolts issued by the Research Council on Structural Connections (RCSC). If you are not already familiar with the RSCS documents, you’ll definitely want to add it to your library and spend some time reading through it.
Here’s the kicker: The RCSC doesn’t deal directly with anchor bolts. In fact, if you were to follow the RCSC verbatim and follow it’s tensioning requirements for 1-1/4″ or 1-1/2″ anchor bolts, the torques and tensions you’d be dealing with would be off-the-charts.
So, the FHWA, in developing its requirements for anchor bolts for large structures, took into account the fact that anchor bolt connections on base plates aren’t providing steel ply-to-steel ply compressive contact needed by, say, a beam splice connection. The anchor bolts are securing a load in-place, whereby the compressive forces needed are for stabilizing & securing the structural base plate.
There is a great study that was authored out of Iowa State University that reviewed the anchor bolt tensioning & testing requirements of several authorities and agencies – I’ll provide a link to the paper at the bottom of this article.
Snug Tight
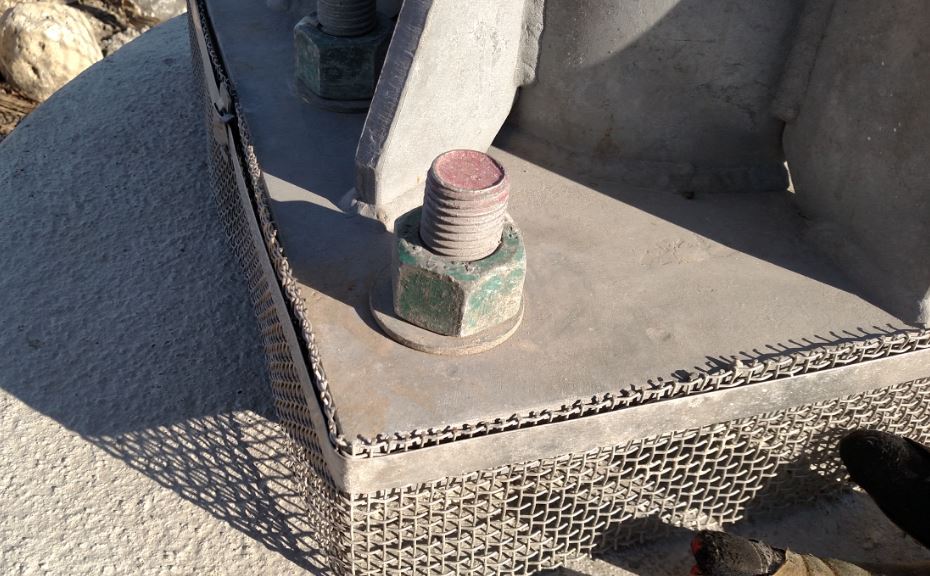
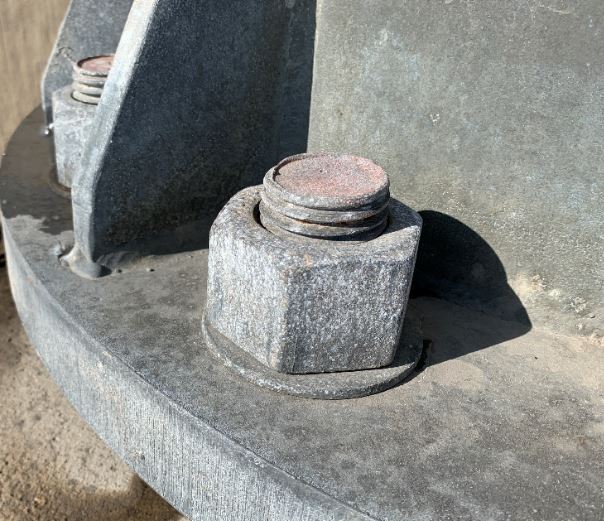
When it comes to tightening anchor rods, we need to understand the concept of a “snug tight” condition is. Snug tight is defined as the tightening/tensioning of a bolt that brings the plys of metal/steel in complete contact with each other. In the case of anchor rods, snug-tight would bring the structure’s base plate in full contact with the leveling nuts that the base plate is sitting on.
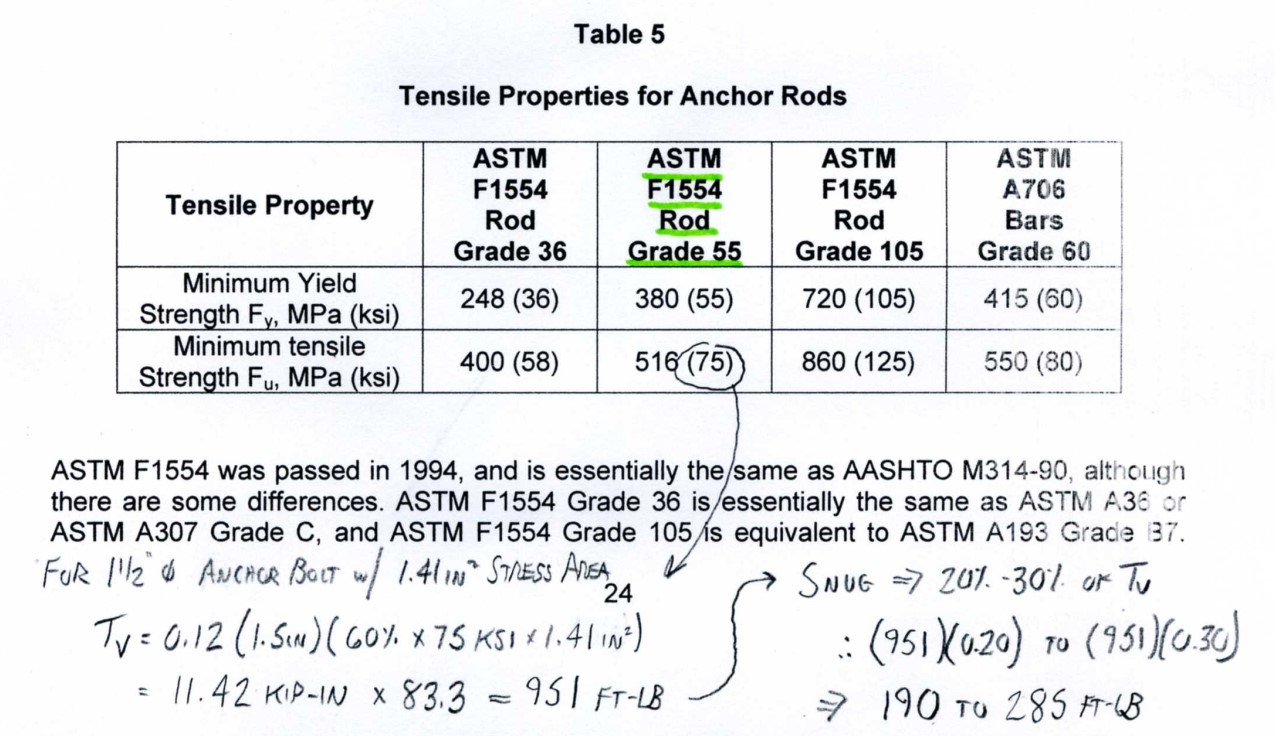
For anchor rods, snug-tight is considered to be between 20 and 30 percent of the bolts “verification torque, ” which is computed:
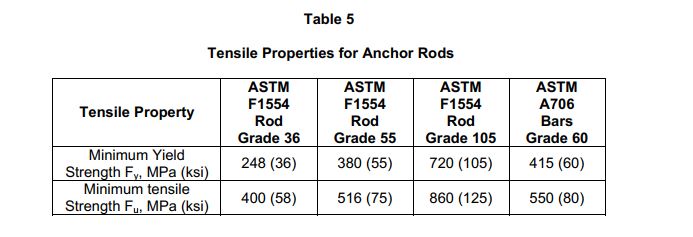
In the formula, the F1 comes from the values on Table 5:
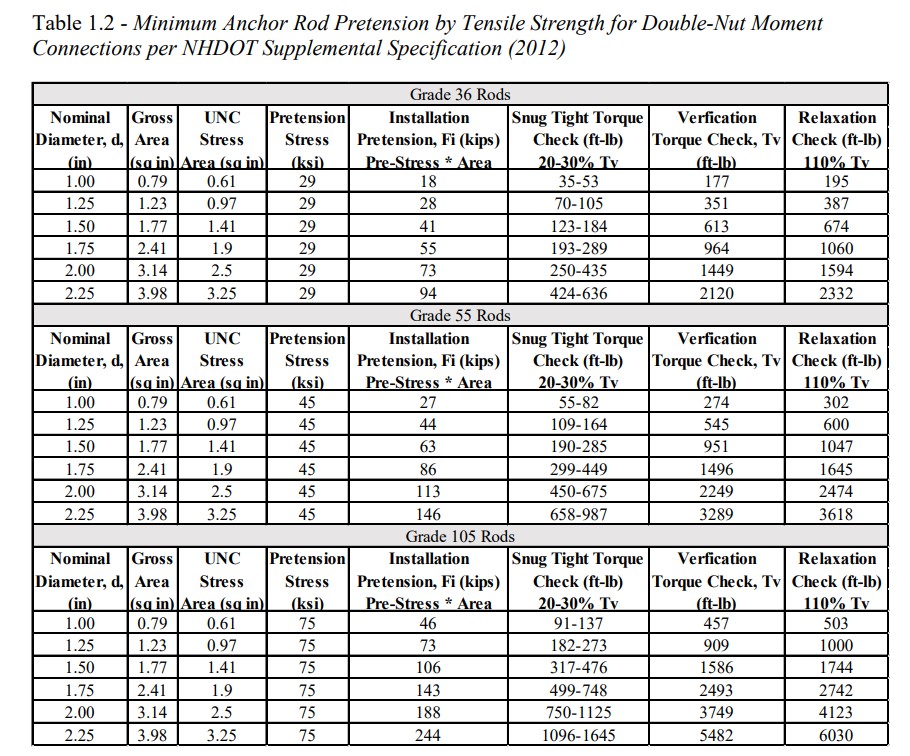
So let’s look at an example of an overhead sign structure that is being installed on a cluster of 1-1/2″ diameter ASTM F1554 Grade 55 anchor rods. I have calculated Snug-Tight torque that we will be using to initially secure the sign post’s base plate to the anchor bolt cluster as well as the Verification Torque, which is the torque reading we will require at final installation:
Verification Torque – 951 ft-lb
Snug Tight Torque – 190 to 285 ft-lbs
This is a far cry from the huge fastener tension values you would calculate if you were treating the installation as a structural splice.
I’ve included an excerpt from the Iowa State White Paper (linked at the bottom of the article) where various tensions & torques have been derived for some common bolt types & sizes. You’ll want to run your numbers for your specific bolt grade & size, the table is a nice reference check.
So with these resources and simple calculation methodologies, you have the ability to determine what the required torque is for an overhead sign structure support. With this information, the engineer and the Contractor can set-up a tensioning and inspection program for your project.
Field-Applied Lubricants…?
What I find interesting about how the FHWA arrived at these tensions & torques is that they have made provisional allowances for field conditions that are common:
–Anchor rods should be cleaned & free of damage prior to the installation,
–They recommend making sure the anchor rod threads have some measure of lubrication on them, such as beeswax or toilet-ring wax on them.
The use of field-applied lubricants was a new one on me as typically, with structural steel bolting, we do not use any sort of secondary lubrication on bolts beyond the lubricant applied to the bolt prior to them being shipped in sealed kegs to the jobsite. Interesting…
Other Anchor Rod Issues
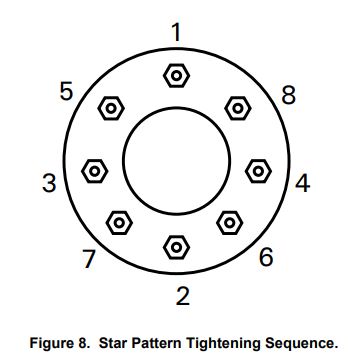
The manner in which the anchor bolts are tightened is important. FHWA recommends using a “Star Pattern,” which is similar to the way we were all taught to install lug nuts on a wheel (that’s my second lug nut reference…). Making sure that the post is being seated in a uniform fashion keeps from introducing un-necessary localized strains in the base plate, as well as providing a uniform seating of the plate on the leveling bolts.
Highway standards and specifications will vary with regards to bolt size, washer and nut requirements. Some agencies require lock nuts, others require double-nuts while others may allow peening or marring of the threads.
Personally, I don’t like the idea of peening or marring the threads, only because damaging the anchor stem is hard to repair – I understand that the likelihood of ever needing to remove all the nuts to remove the structure is rare, I’d simply rather not see that done.
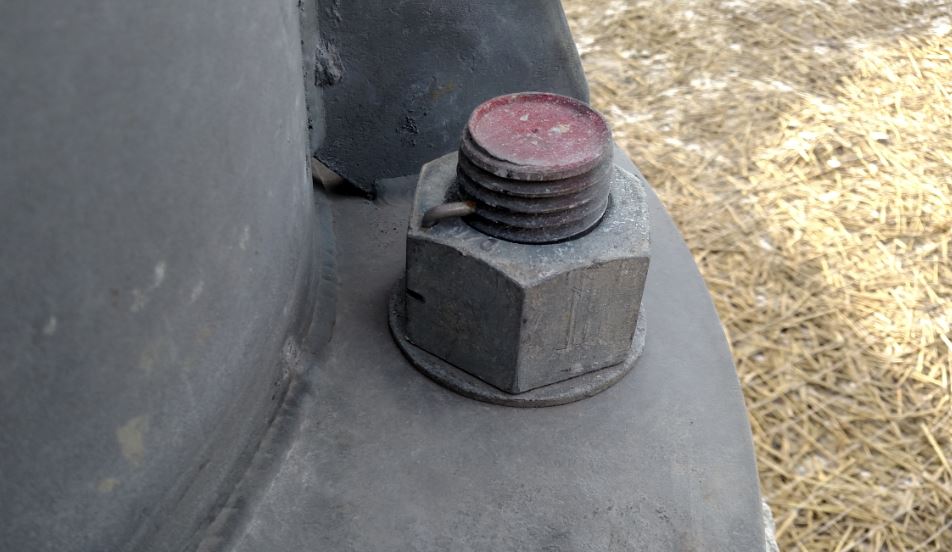
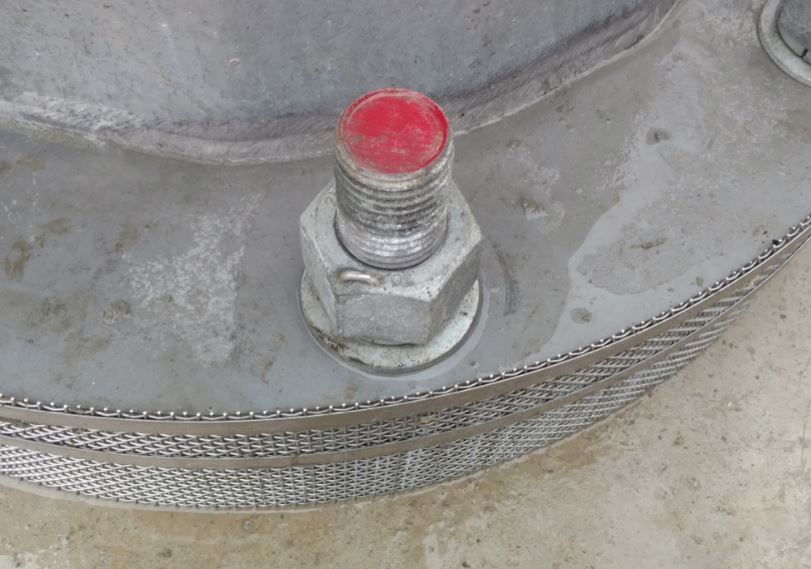
Most agencies will require nuts with the locking pin on them – The pin is meant to keep the nut from backing off, but it can be bent or removed if, by chance, there is ever a need to remove the nut.
Another thing to keep in mind – Sign installations don’t end on the night you erect the sign and lock down your anchor bolts. The FHWA require that, after 72 hours, the anchor bolts are re-checked. Not all agencies specify either locking pins or marring or double-nutting. If the nuts were not secured during the initial installation, they can become loose: Believe me, I’ve seen it occur.
Another problems stems from the base plate not being in complete contact with the leveling nuts upon the initial post setting. The erection of a sign structure post or leg is a serious pick-and-set, so some of the details can get lost. Sign contractors are usually good about checking that all the leveling bolts are set true to each other, but you’ll always want to, after the post is set, to go around the leveling bolts to micro-adjust them to make sure they are all in good contact with the plate.
After Actions
I have been looking forward to writing this article for quite a while – The subject of bolt tensioning comes up frequently on heavy highway projects and I’m glad to be able to provide a ready-reference for pulling down resources and data when you need them in the future.
Take some time this week to brush up on your anchor bolt knowledge base. Granted, you may not be dealing with bolt-up conditions like this more than a couple of times per job, but, having the knowledge to understand how the requirements work will go a long way.
Anchor Bolting Resources & References
These are some outstanding bolting & signing links and references that you can use in the future. Don’t be afraid to bookmark this webpage and add it to your toolbox for future use. I hope you’ll come back and use it as a clearinghouse reference for yourself down-the-road. Cheers!!!






Excellent post! Not only informative but written in a compelling way. Added to my favorites. Thank you.
Thanks Tony!!